CanMV-K210 Development Environment Setup
1. Install Serial Terminal Assistant
This guide uses the CH343 driver on Windows 10 x64 as an example. If you have already installed the CH343 driver, you can skip the installation steps below.
1.1 Install Serial Port Driver
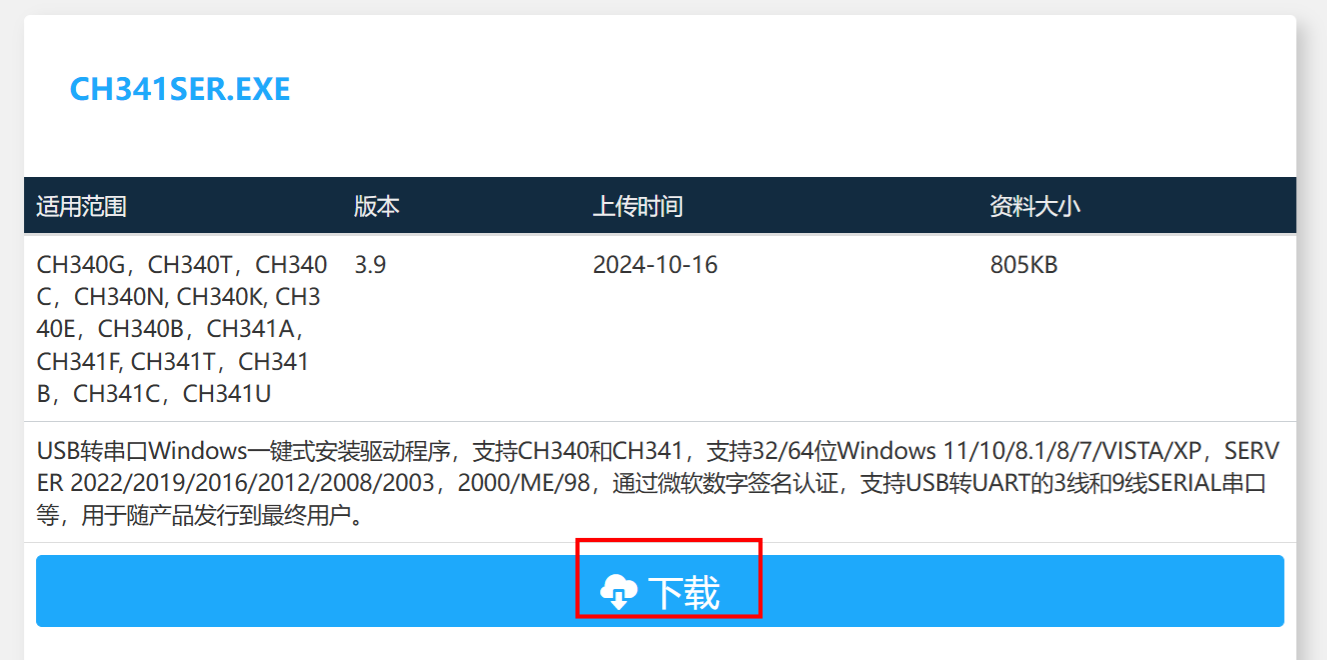
- Go to Download Serial Port Driver.
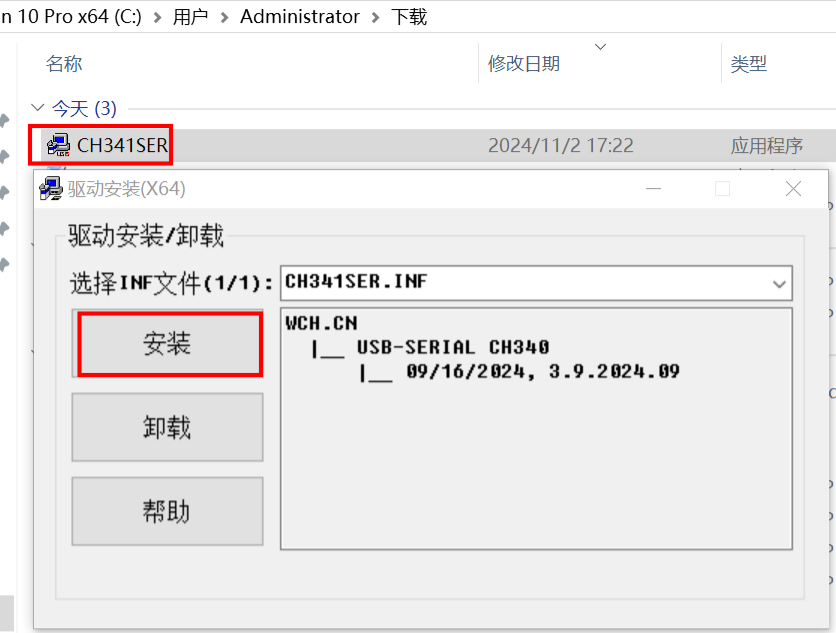
- Double-click CH341SER.EXE and click Install.
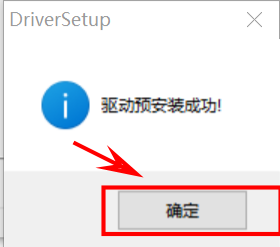
- When installation completes, a success message is displayed.
- Connect the K210 development board to your computer with a Type-C cable. Then right-click This PC → Properties → Device Manager → Ports (COM & LPT). The corresponding CH343 port should appear.
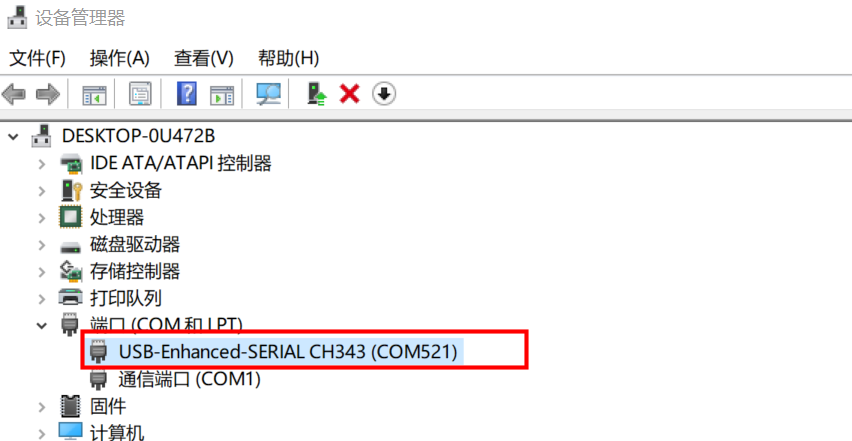
Note: The port number differs on each computer. As long as CH343 is detected, you have the correct port.
1.2 Open Serial Terminal Assistant
- Go to Download UartAssist Serial Terminal and click Download.
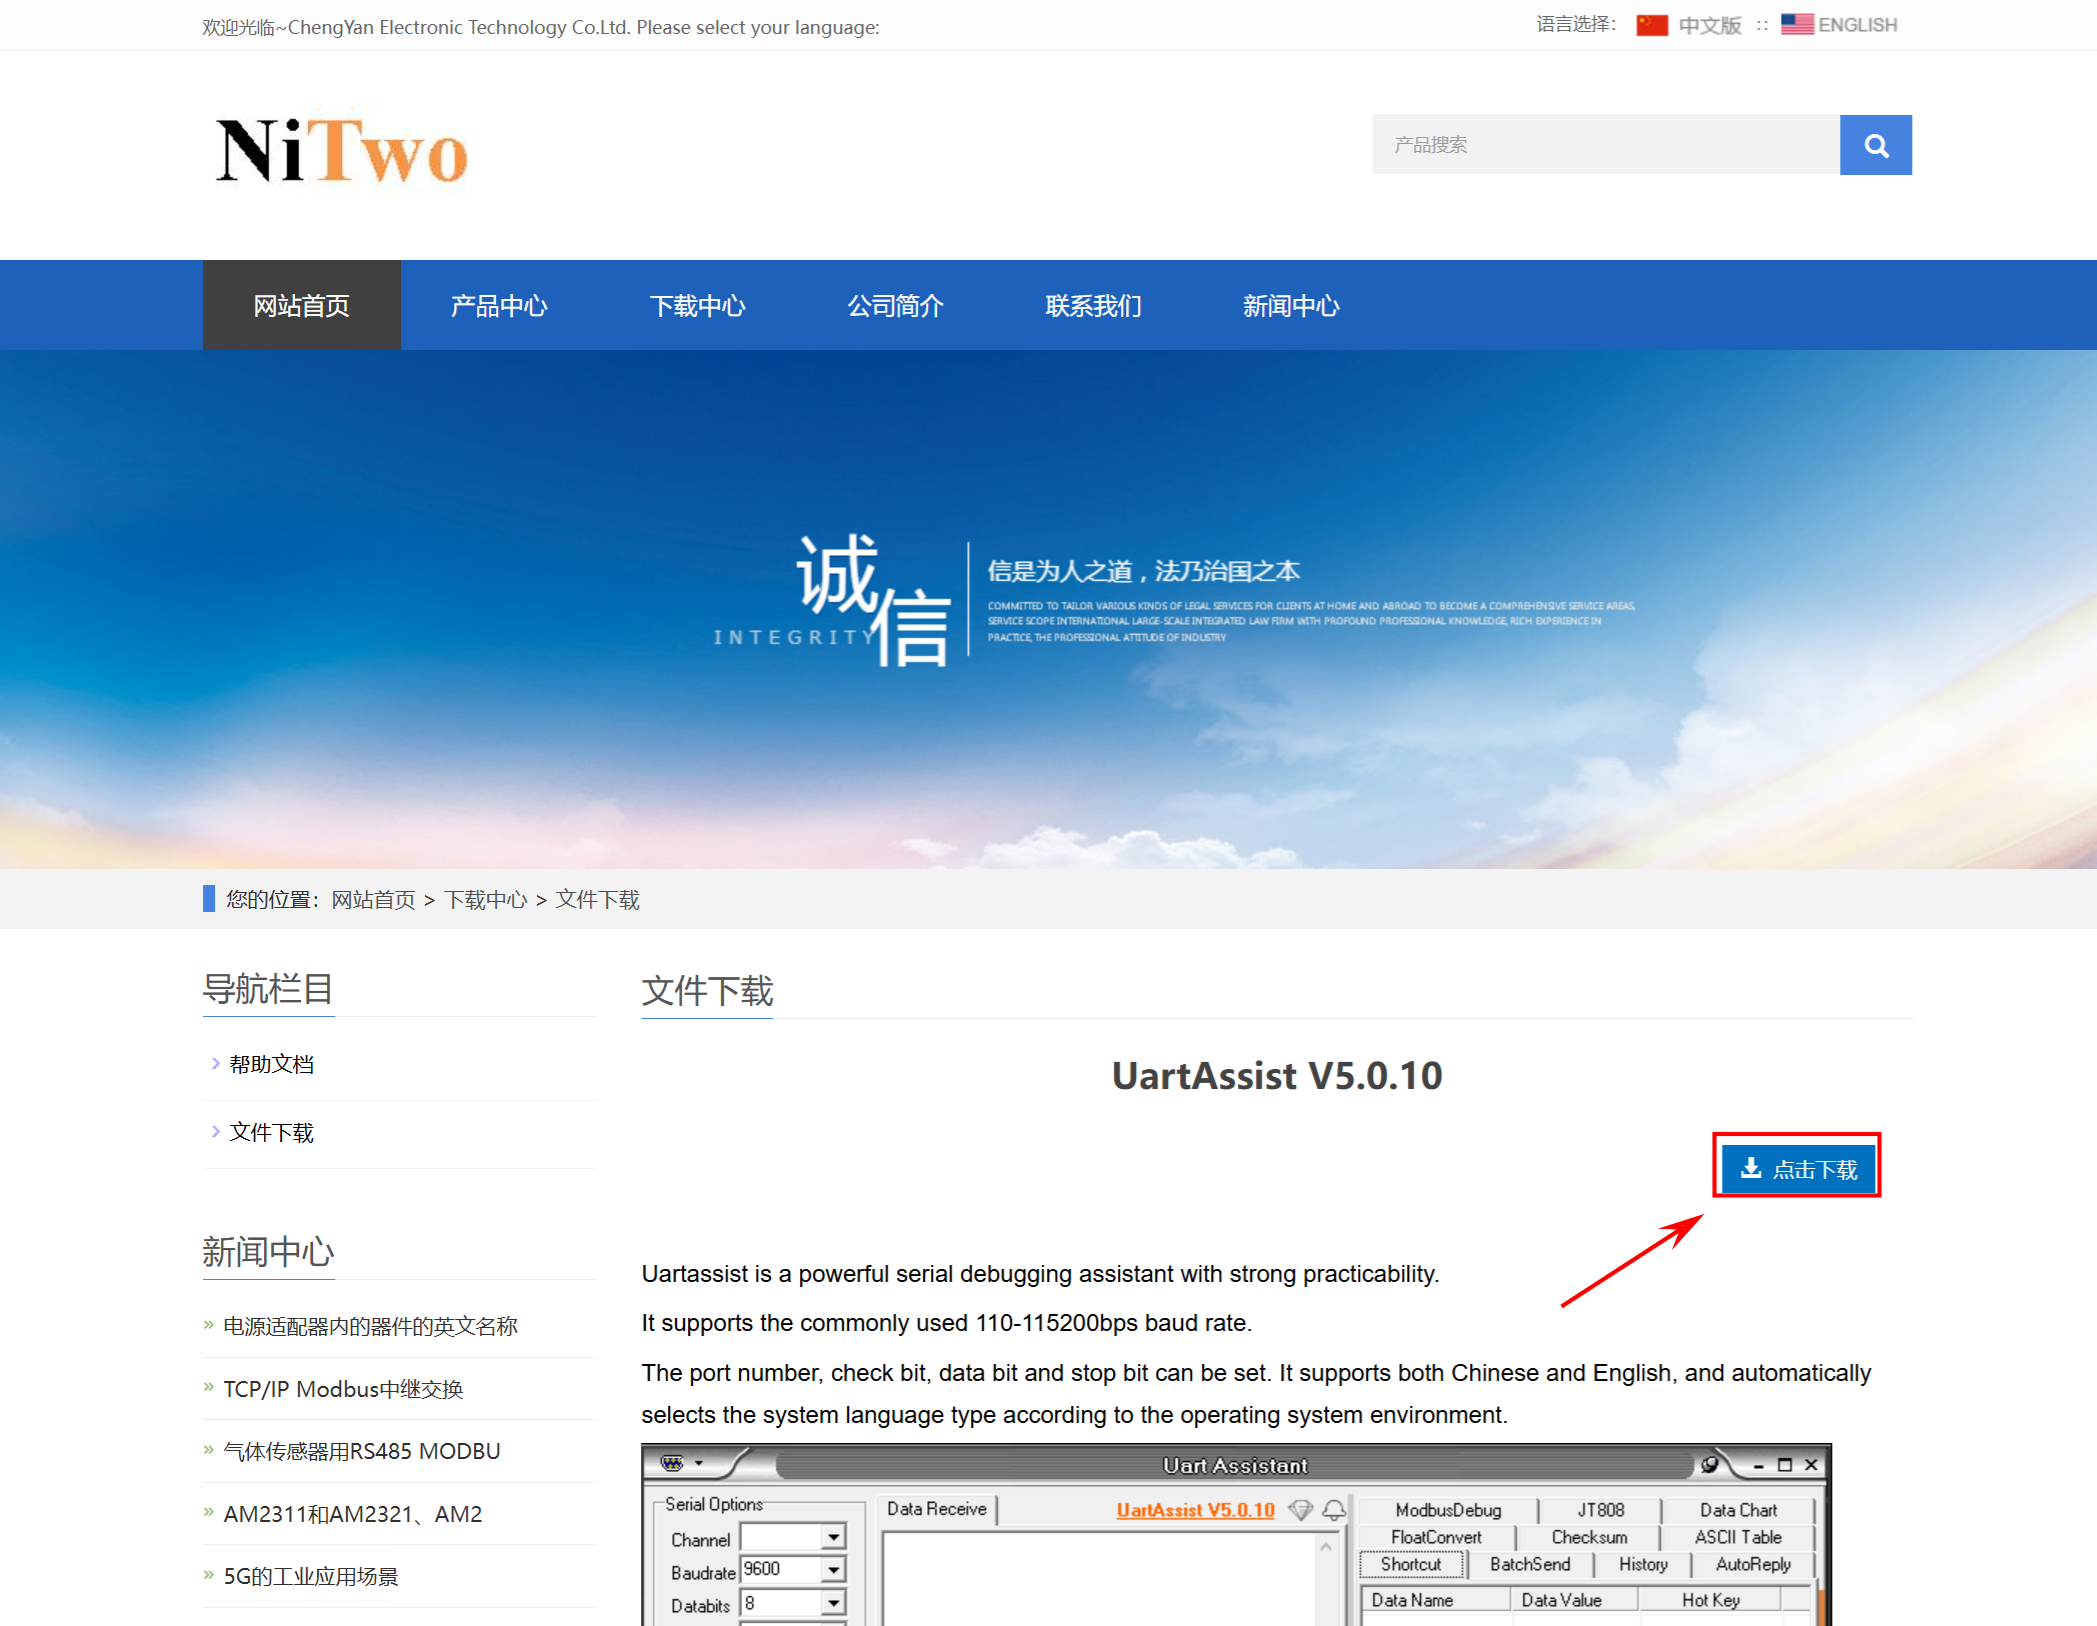
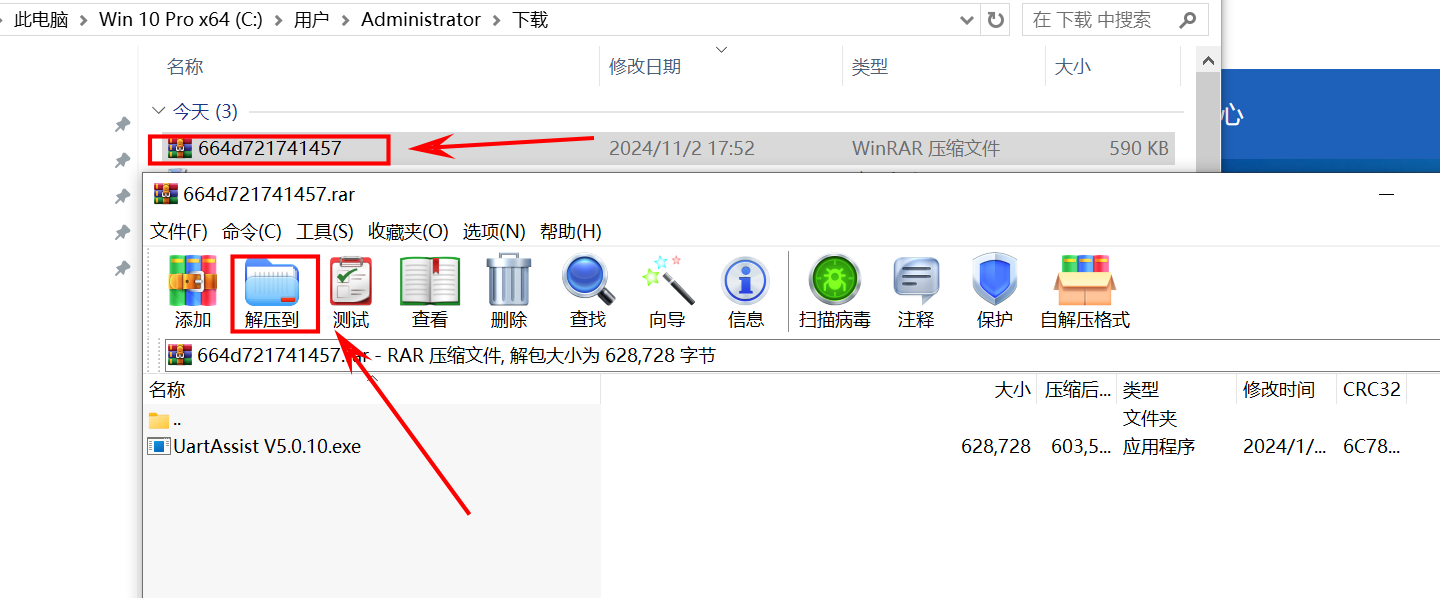
- After downloading, open the archive and extract it to the desktop.
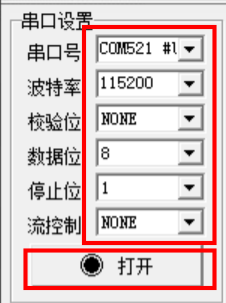
- Open UartAssist on the desktop and configure the serial port settings: select the K210 development board's port number, set baud rate to 115200, parity to NONE, data bits to 8, stop bits to 1, and flow control to NONE. Click Open. The button changes to Close and the icon turns from black to red.
- At the bottom of the serial terminal, 4.DTR and 7.RTS are red by default. Click 4.DTR and 7.RTS to turn them green, then press the K210 development board's reset button. If the firmware on the board does not print any information, nothing will be displayed.
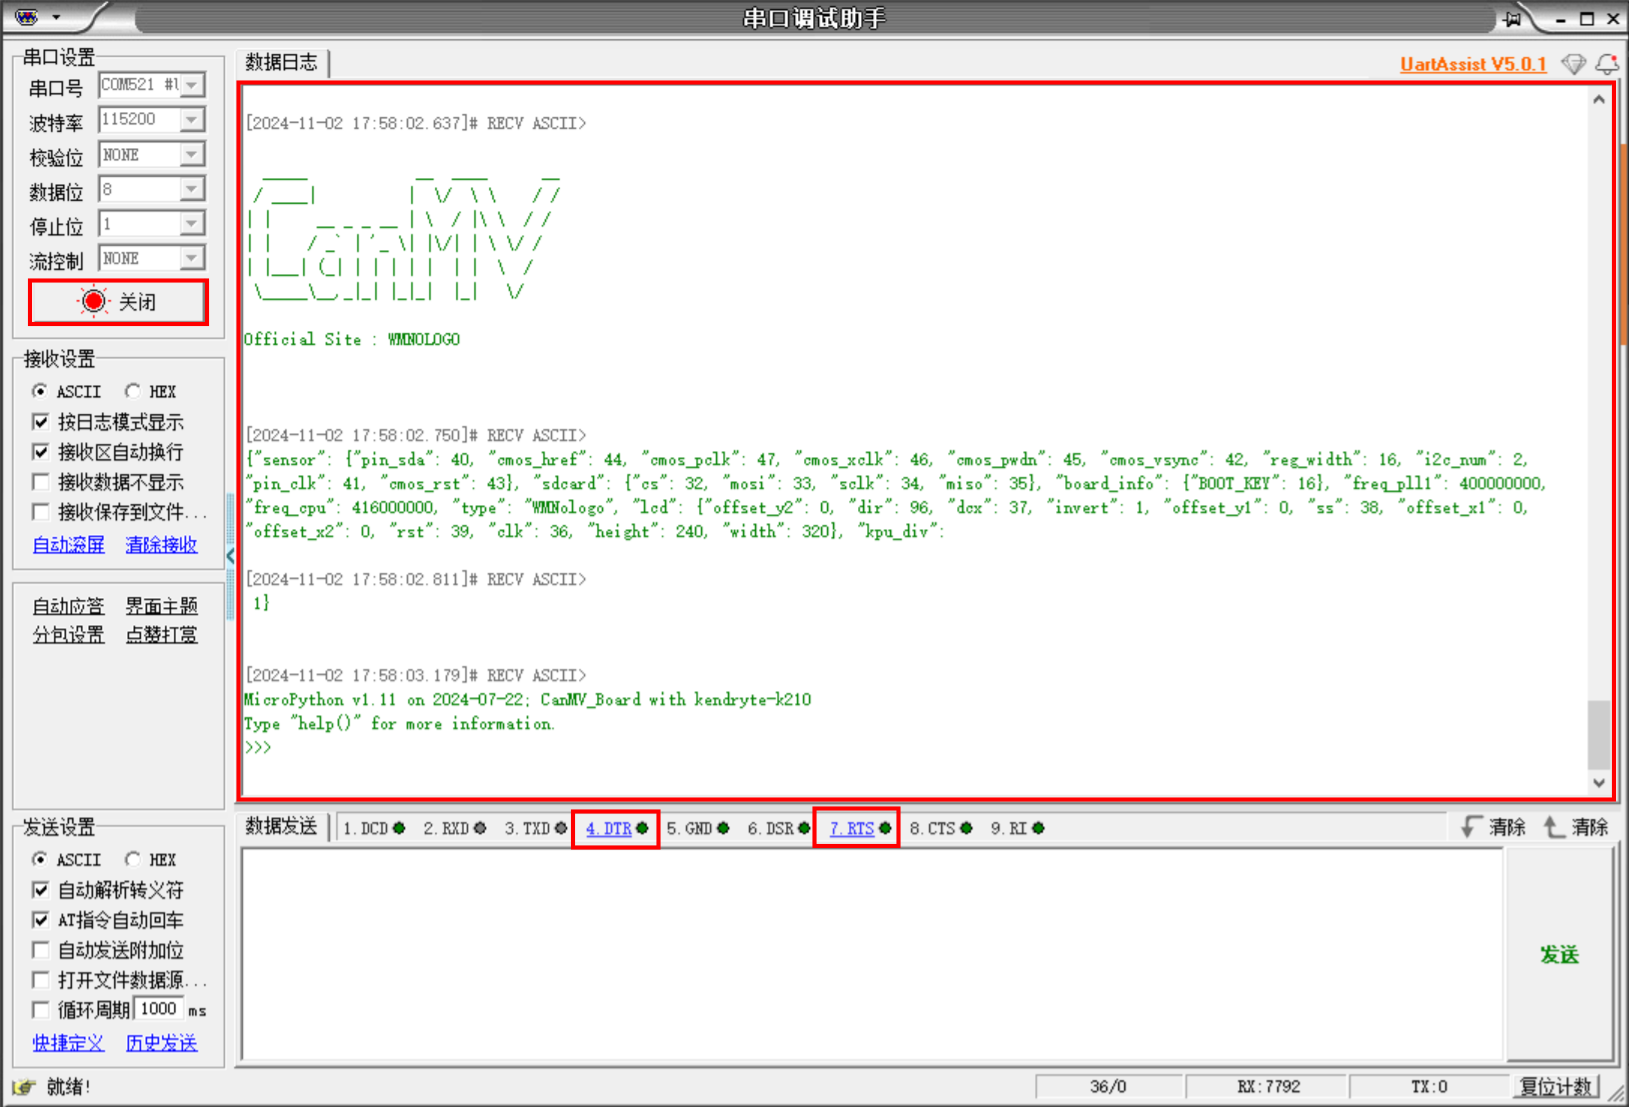
- The serial terminal assistant is now set up.
2. Install CanMV IDE
- Download the CanMV IDE package from the learning materials.
- After downloading, open the archive and extract it to the desktop.
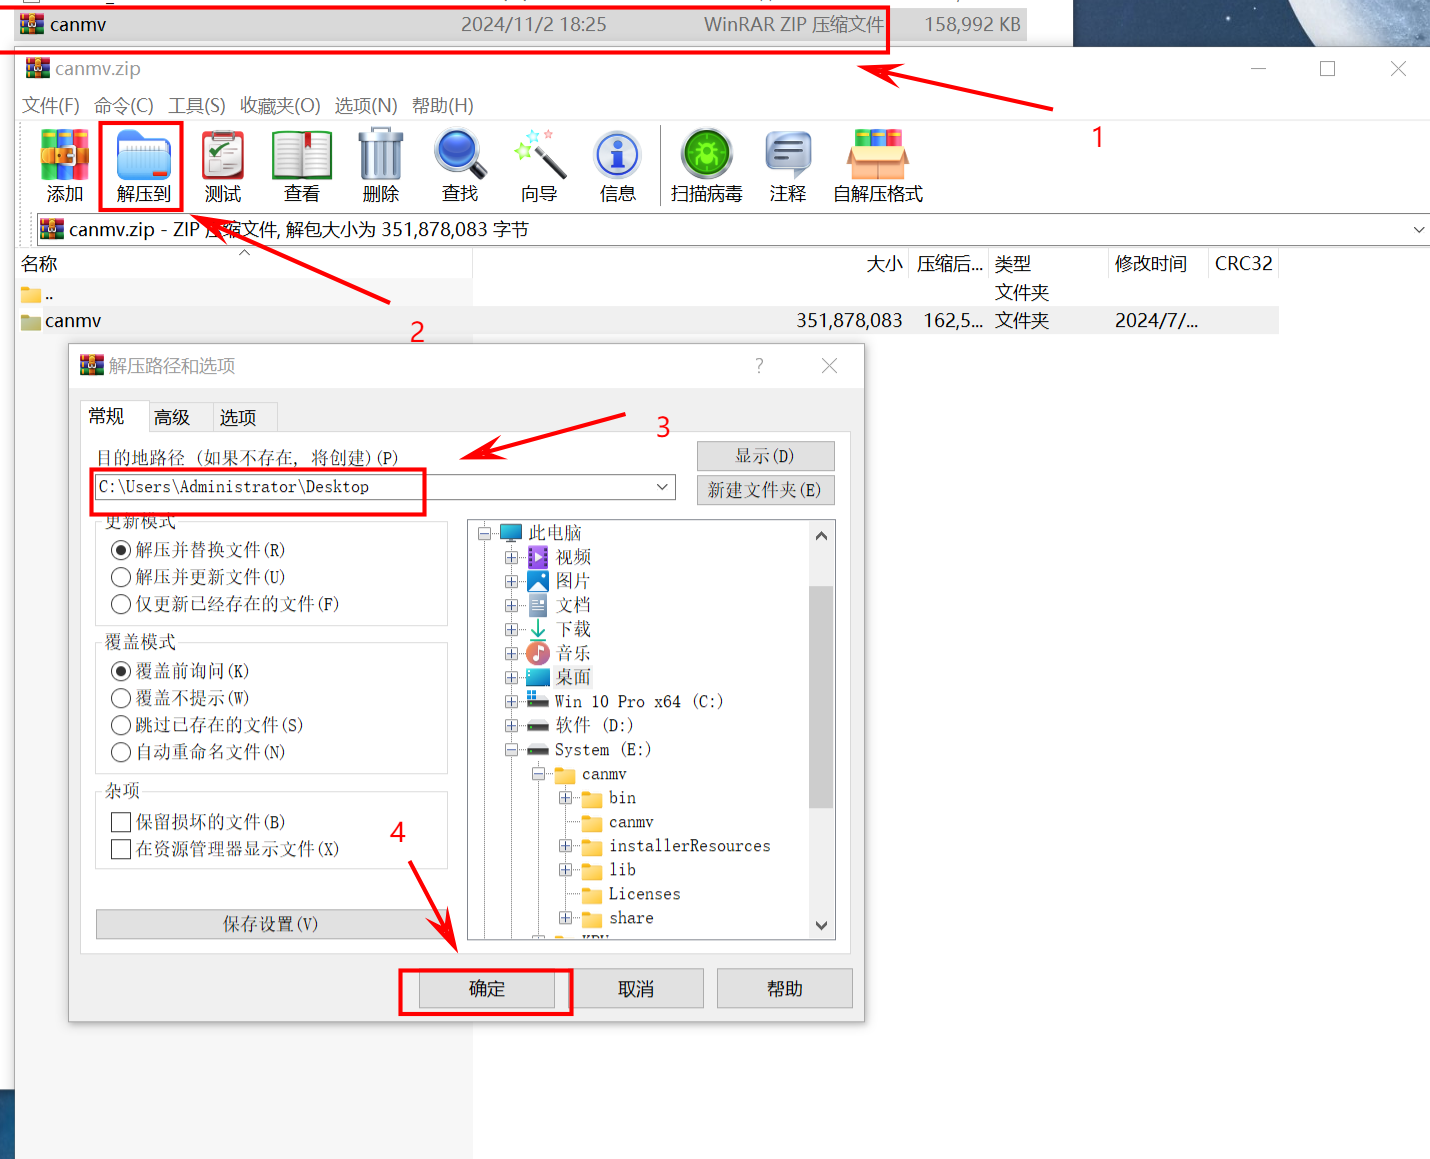
- After extraction, go to the
canmv/bindirectory and double-clickcanmvideto run it.
- After extraction, go to the

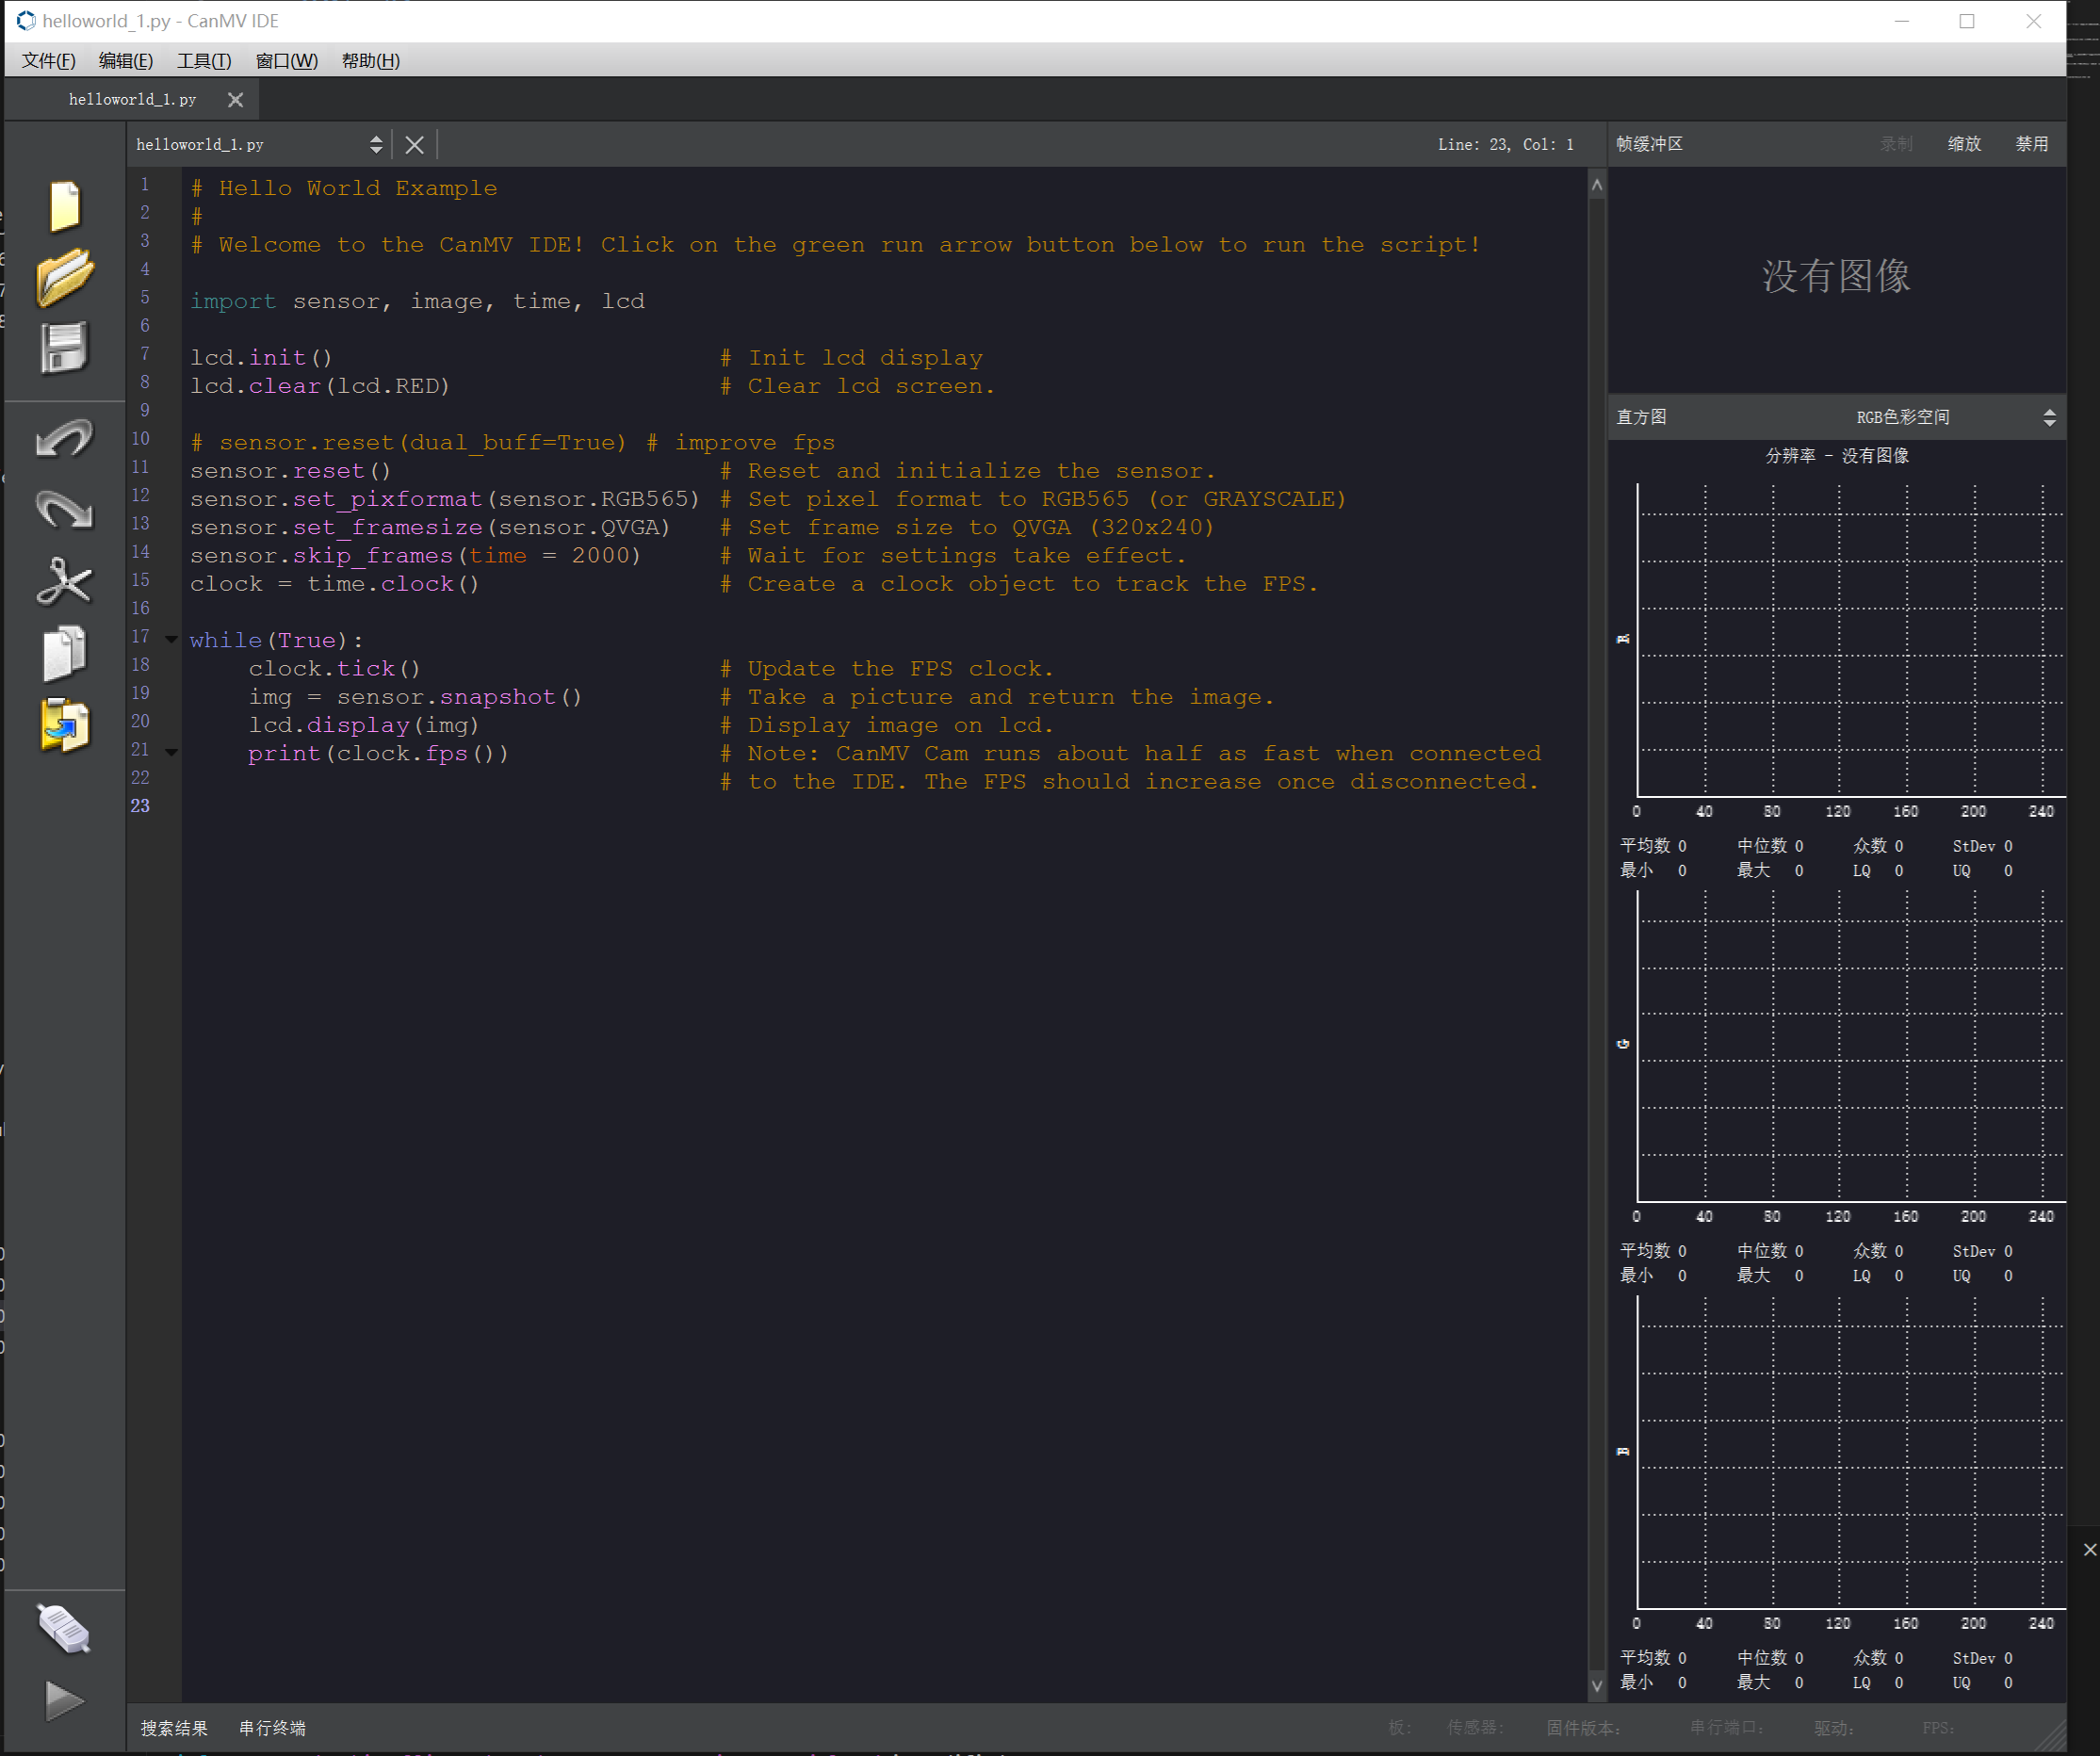
- CanMV IDE is now installed.
3. Flash Factory Firmware
3.1 Factory Firmware Overview
The official bare-metal K210 SDK does not support MicroPython. You must download CanMV-compatible firmware to use MicroPython.
The K210 module is shipped with factory firmware pre-flashed, so you can connect to CanMV IDE and program with MicroPython syntax. You do not need to flash factory firmware every time. Re-flashing is only required for firmware upgrades or after flashing other firmware.
Factory firmware is provided as a binary flash file only; source code is not included. To study the underlying MicroPython firmware source code for K210, visit the official CanMV project.
3.2 Erase Chip Firmware
If firmware was previously flashed, perform a full-chip erase before re-flashing.
Note: This step clears the K210 module's Flash program space. After erasing, you must re-flash firmware before CanMV IDE can connect.
- Open CanMV IDE, click Tools, then click K210 Flash Tool.
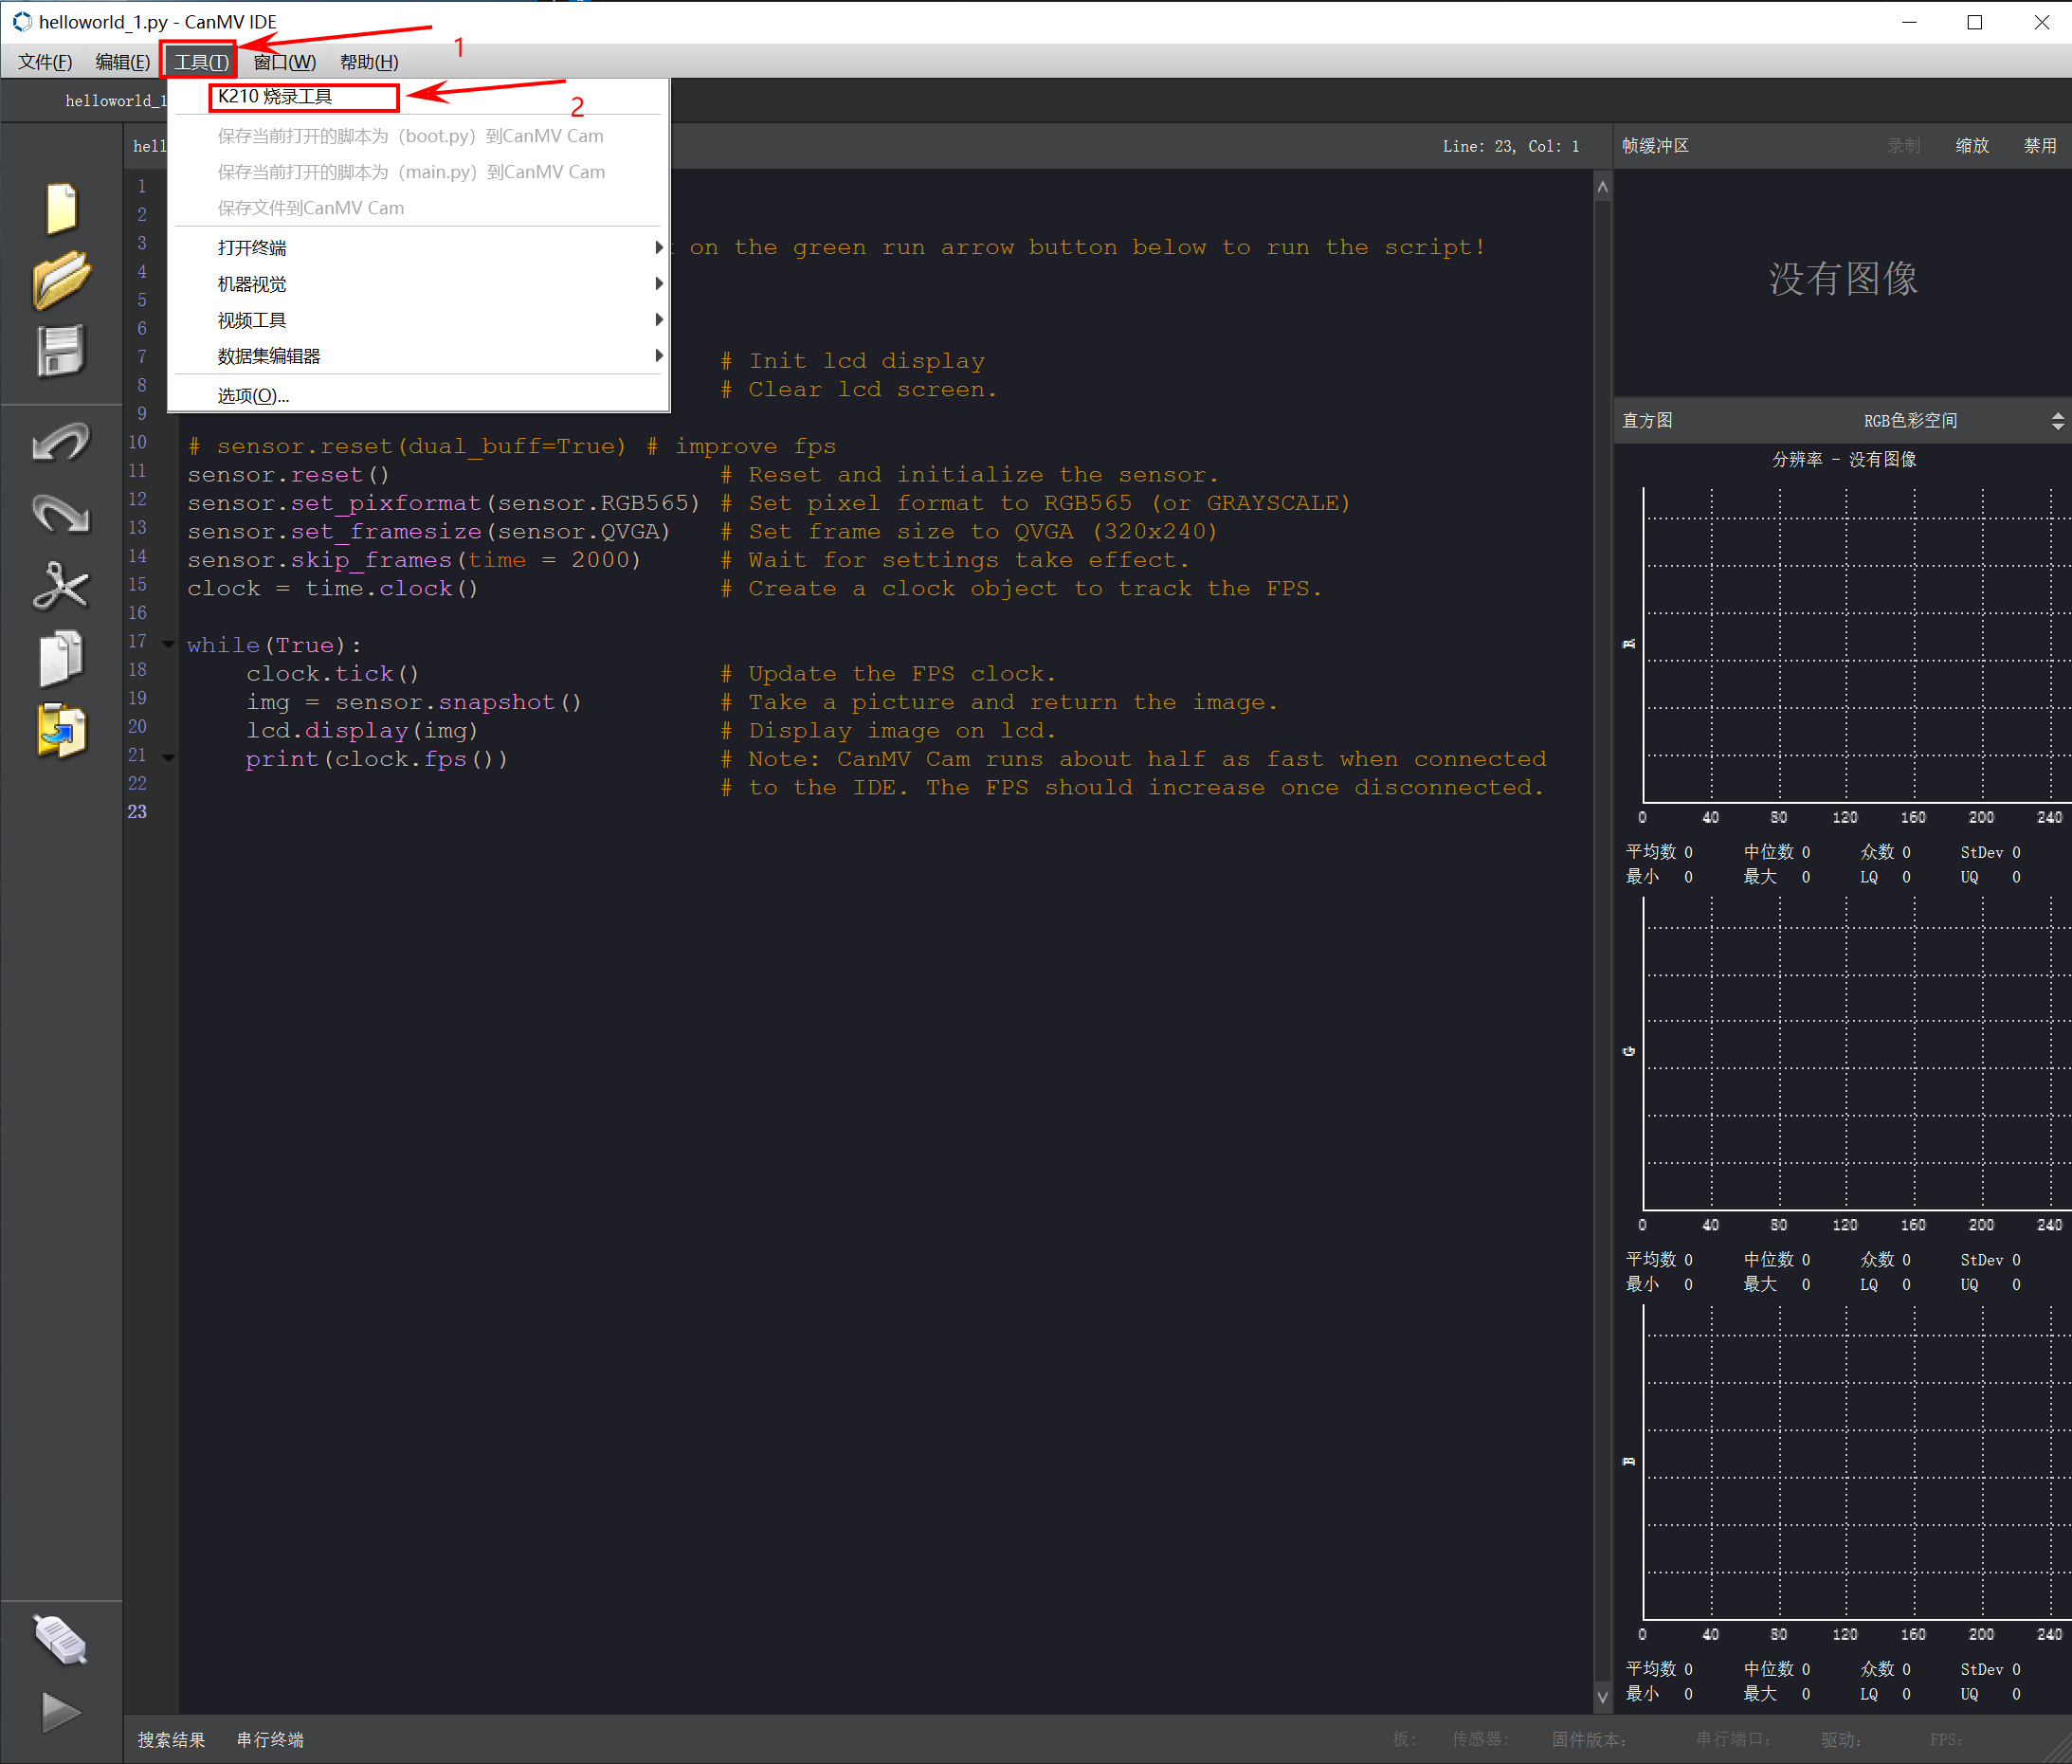
- Switch to the Erase tab.
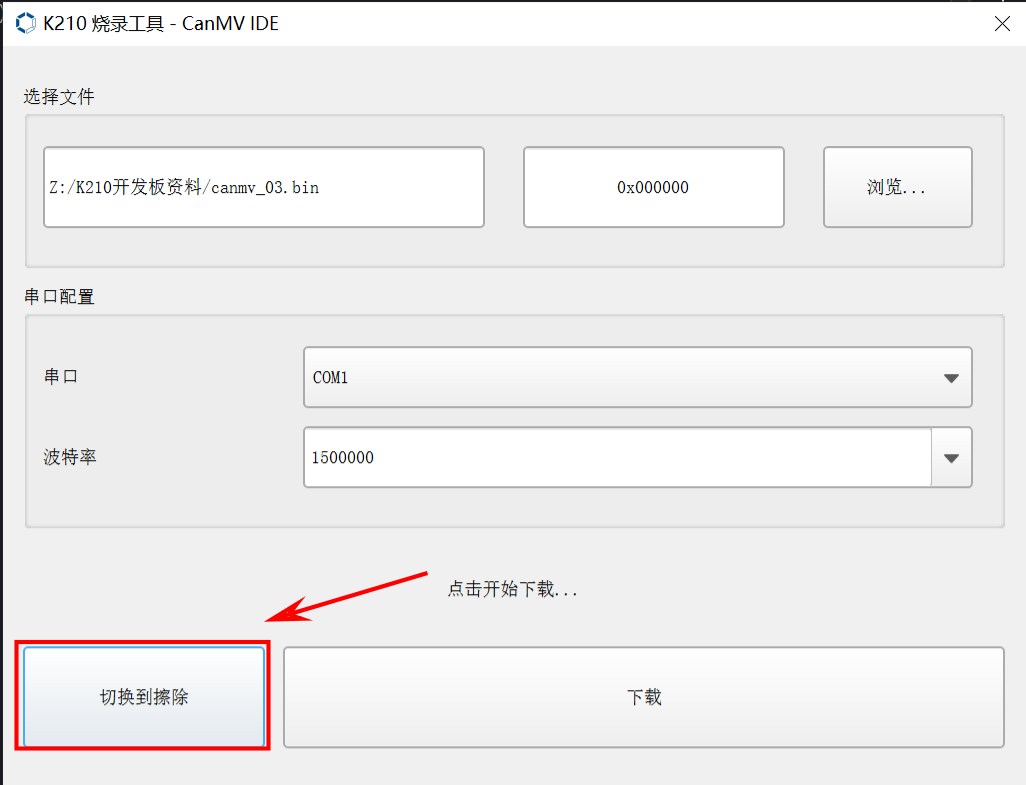
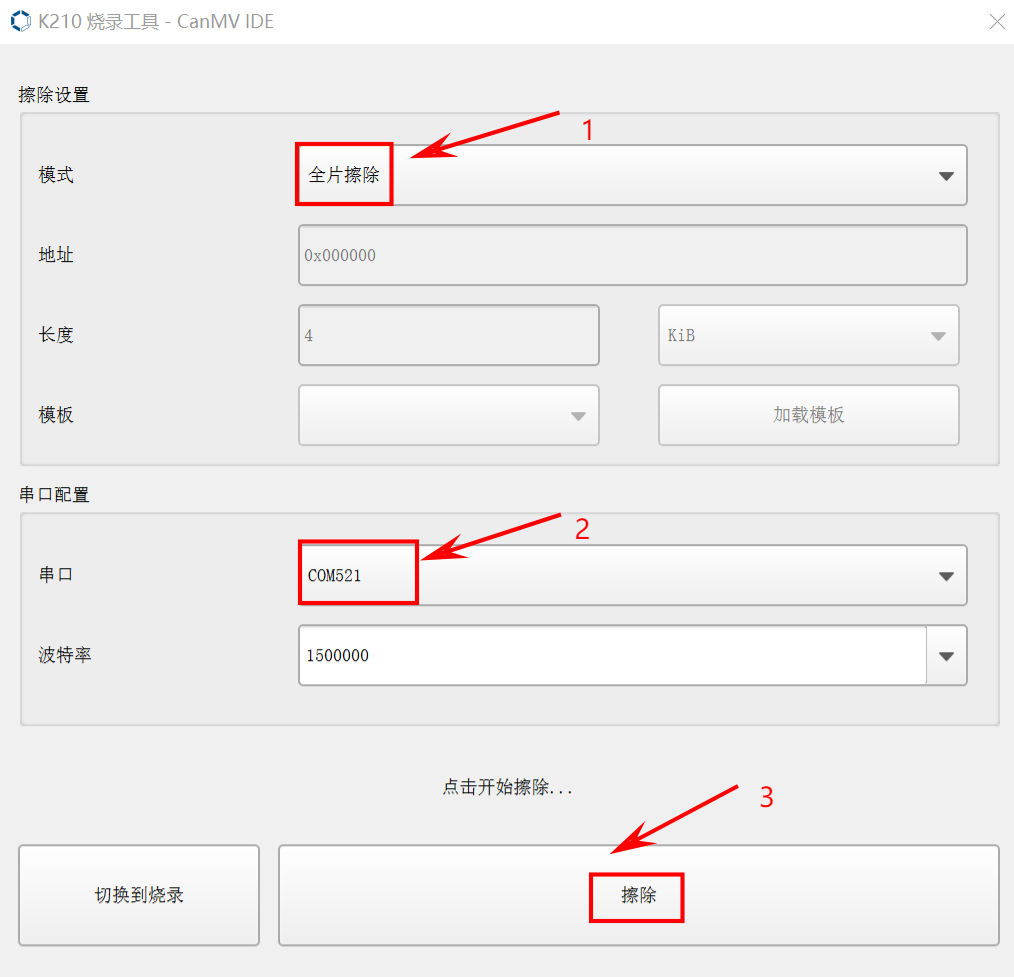
- In the erase settings, select full-chip erase mode, choose the K210 module's serial port, and click Erase to clear program space.
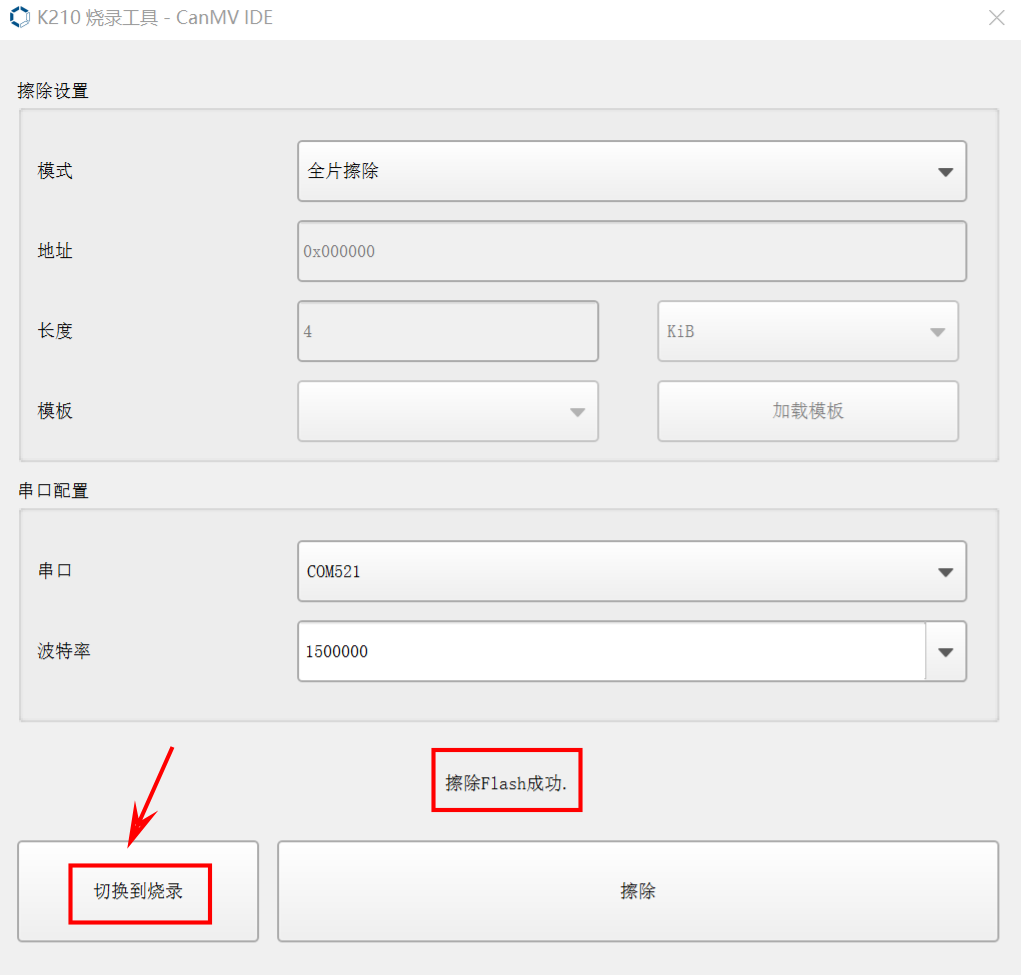
- After erasing completes, switch to the Flash tab and re-flash the firmware.
3.3 Re-flash Firmware
- Download the firmware from the learning materials. The file name is
canmv_03.bin.
- Download the firmware from the learning materials. The file name is
- Click Browse and select the firmware file to flash. Leave the flash address at the default
0x00000. Select the K210 module's serial port, then click Download.
- Click Browse and select the firmware file to flash. Leave the flash address at the default
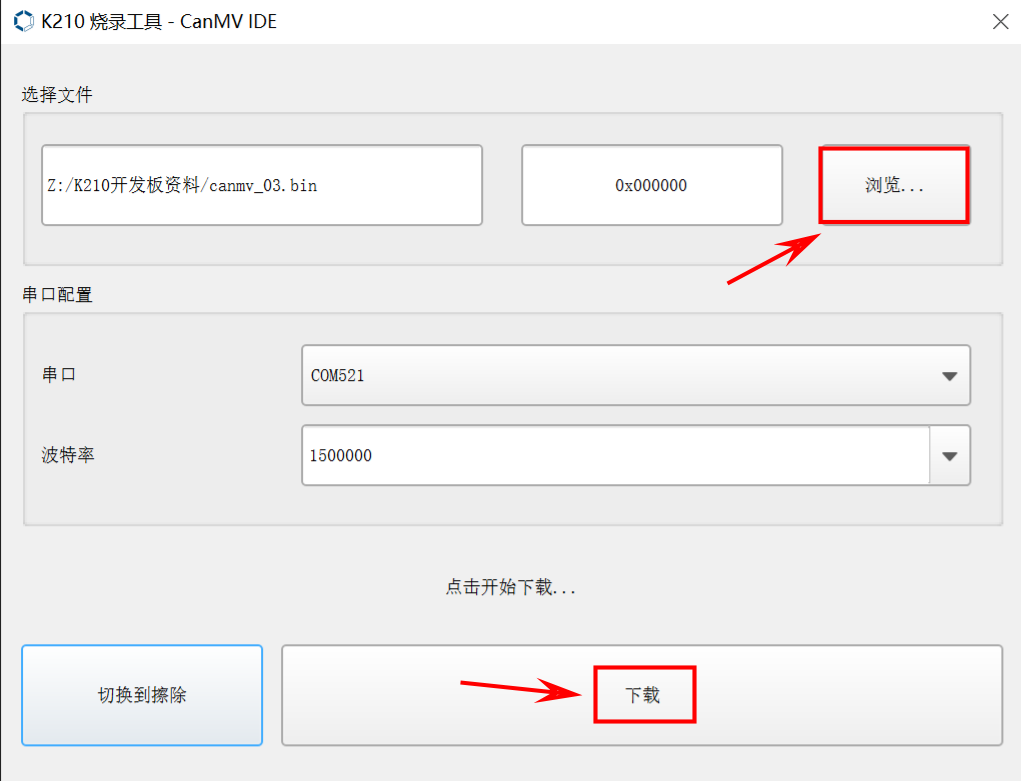
- Wait for flashing to complete. A message indicating FlashISP write to Flash succeeded will appear.
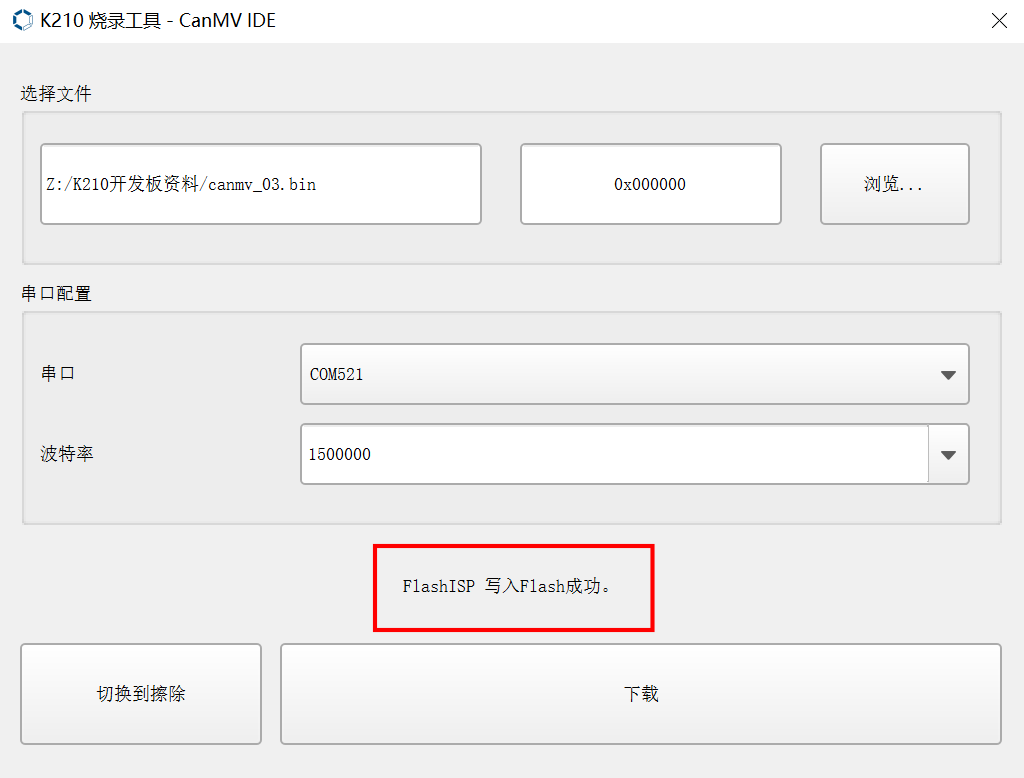
- Firmware flashing is complete.
4. Import Routines into IDE
4.1 Download Factory Routines
Download the K210 routine source code archive from the learning materials and extract it.
4.2 Import Routines
After extraction, place the files in the CanMV folder under Documents.

Open CanMV IDE and click File → Documents Folder to view the routines.
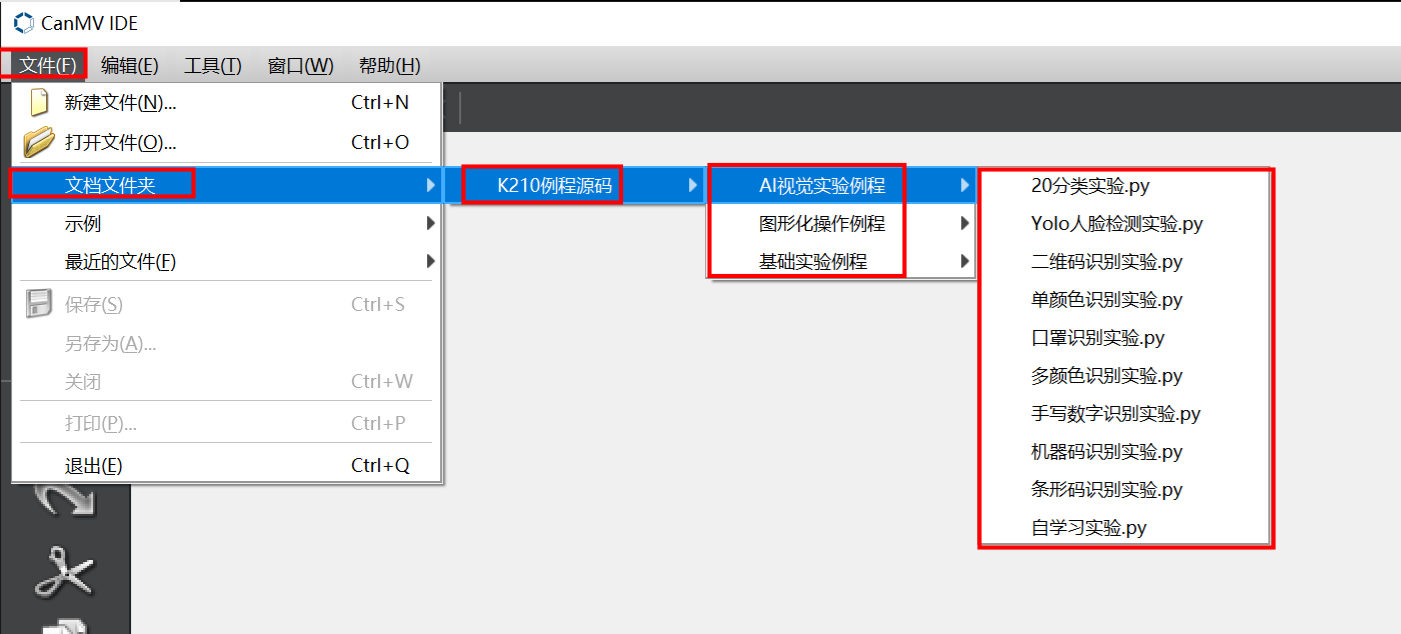
5. CanMV IDE User Guide
Before using CanMV IDE, complete installation of the CH340 driver.
5.1 Connect Device
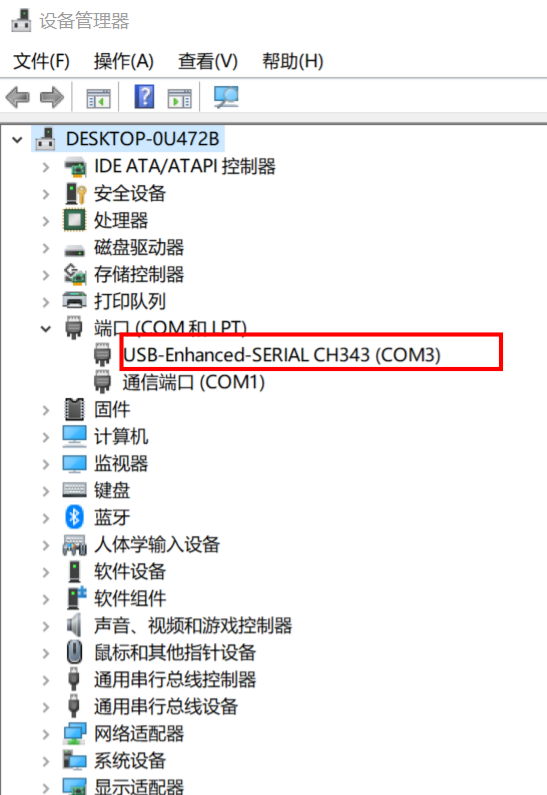
- Connect the Windows computer and K210 device with a Type-C cable. After connecting, open Device Manager and check the new serial port. The port number may be COM3.
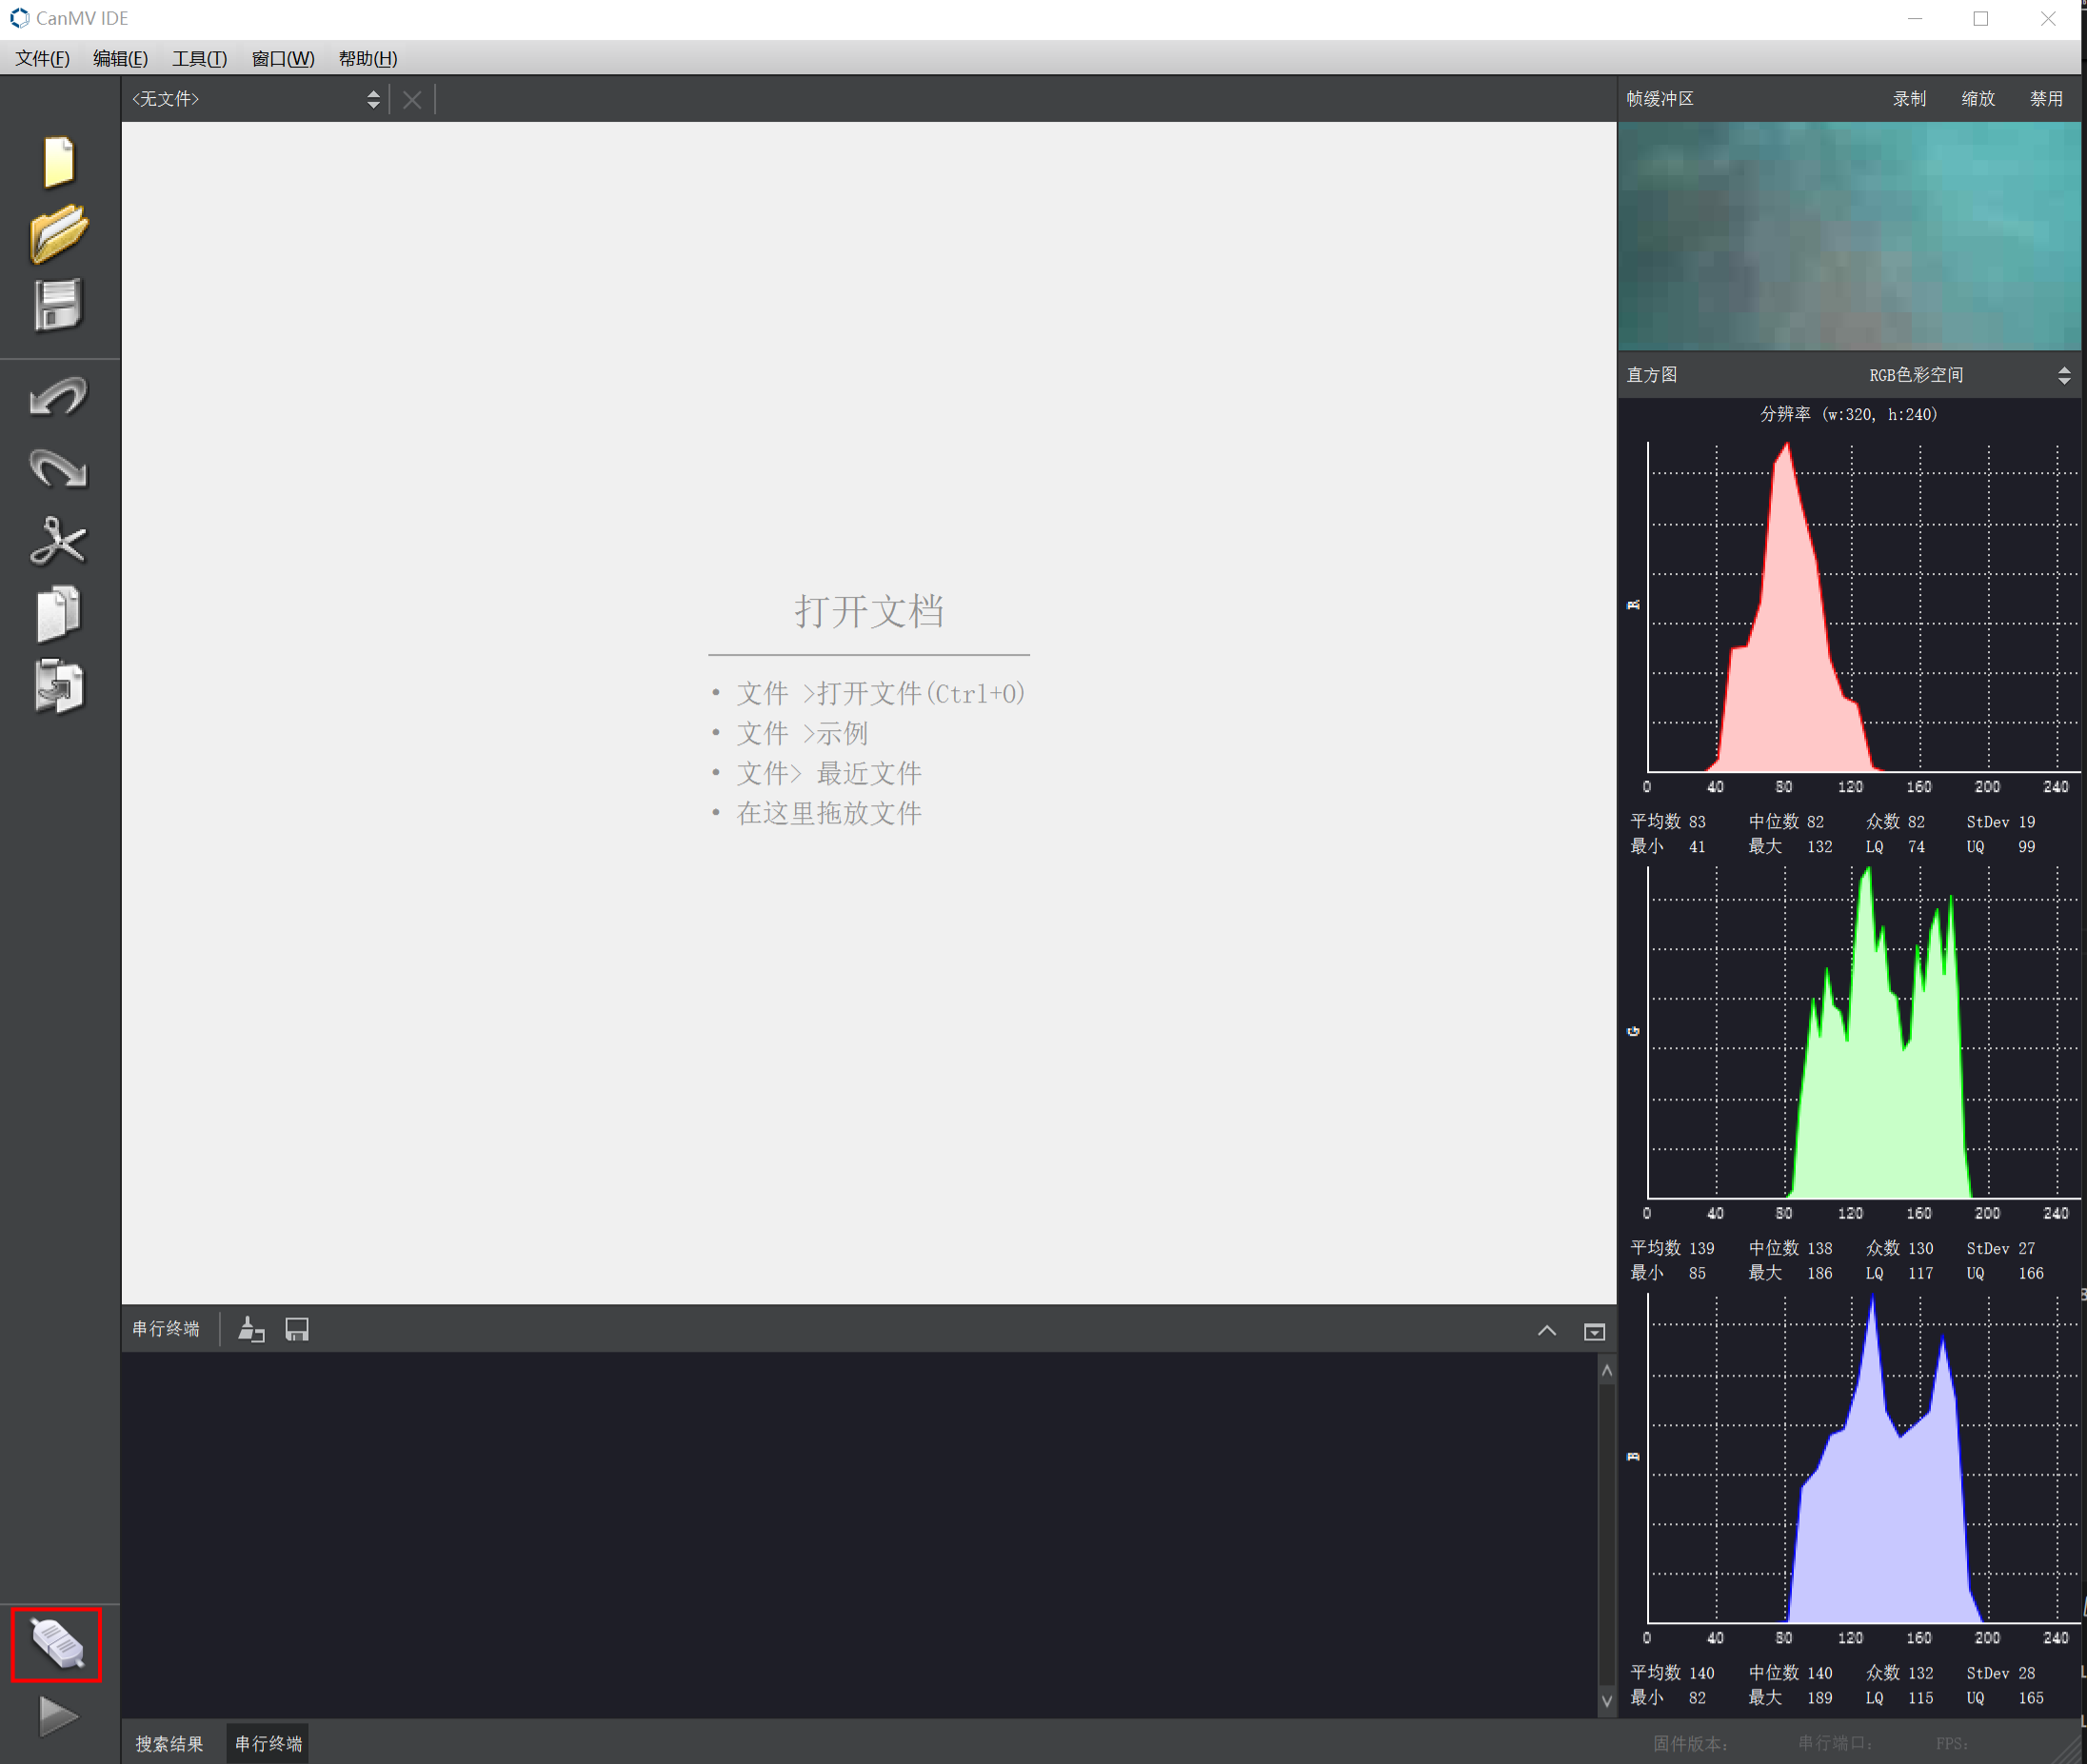
- Click the Connect button in the lower-left corner.
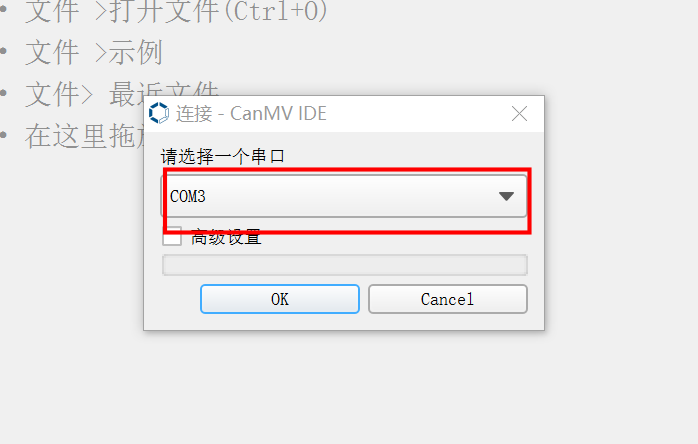
- Select the corresponding COM port.
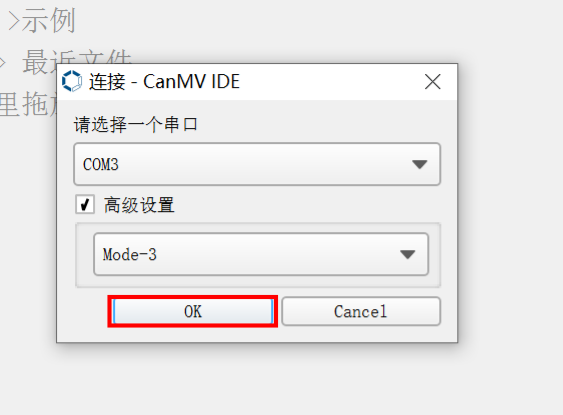
- Click Advanced Settings, select mode-3, and click OK.
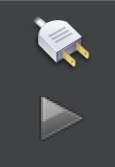
- After clicking OK to connect, a successful connection is indicated by the icon shown below.
5.2 Run a Routine
Before this section, complete IDE routine import, or run programs directly from the Examples menu.
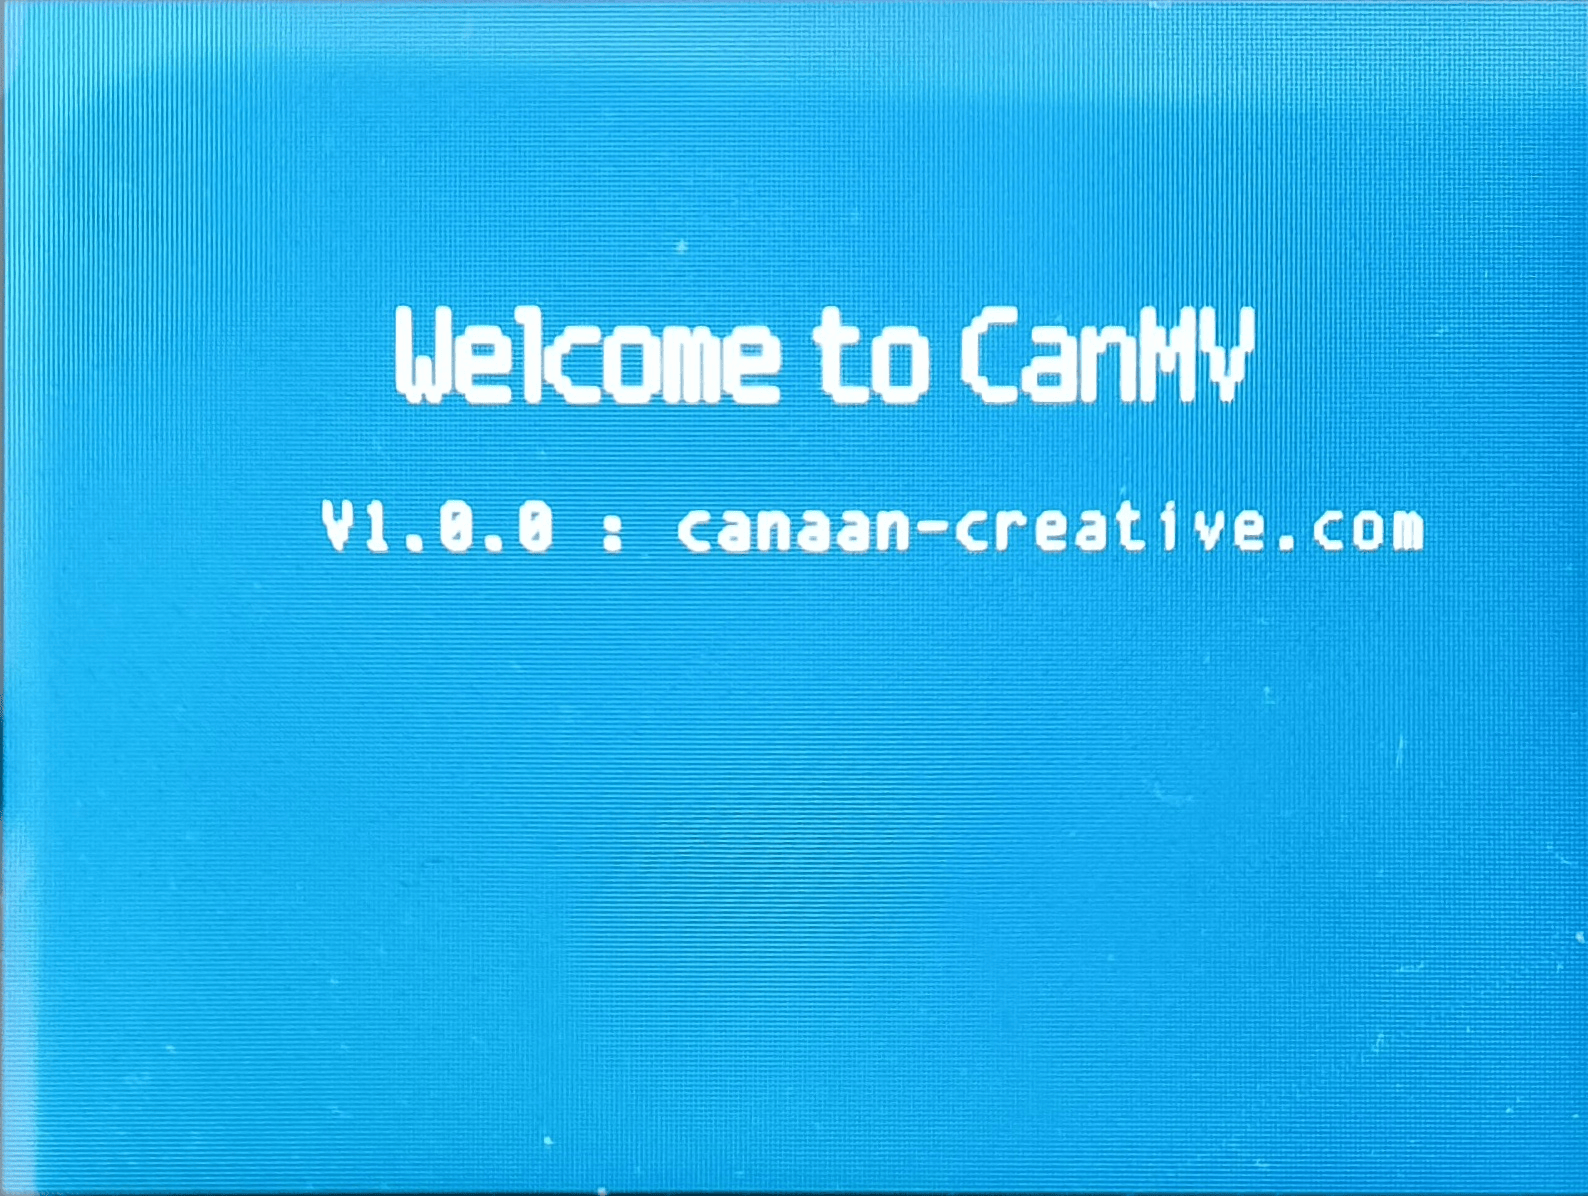
- Connect the device first. If you are using factory firmware, the K210 screen displays the content shown below.
- Open CanMV IDE and connect to the K210.
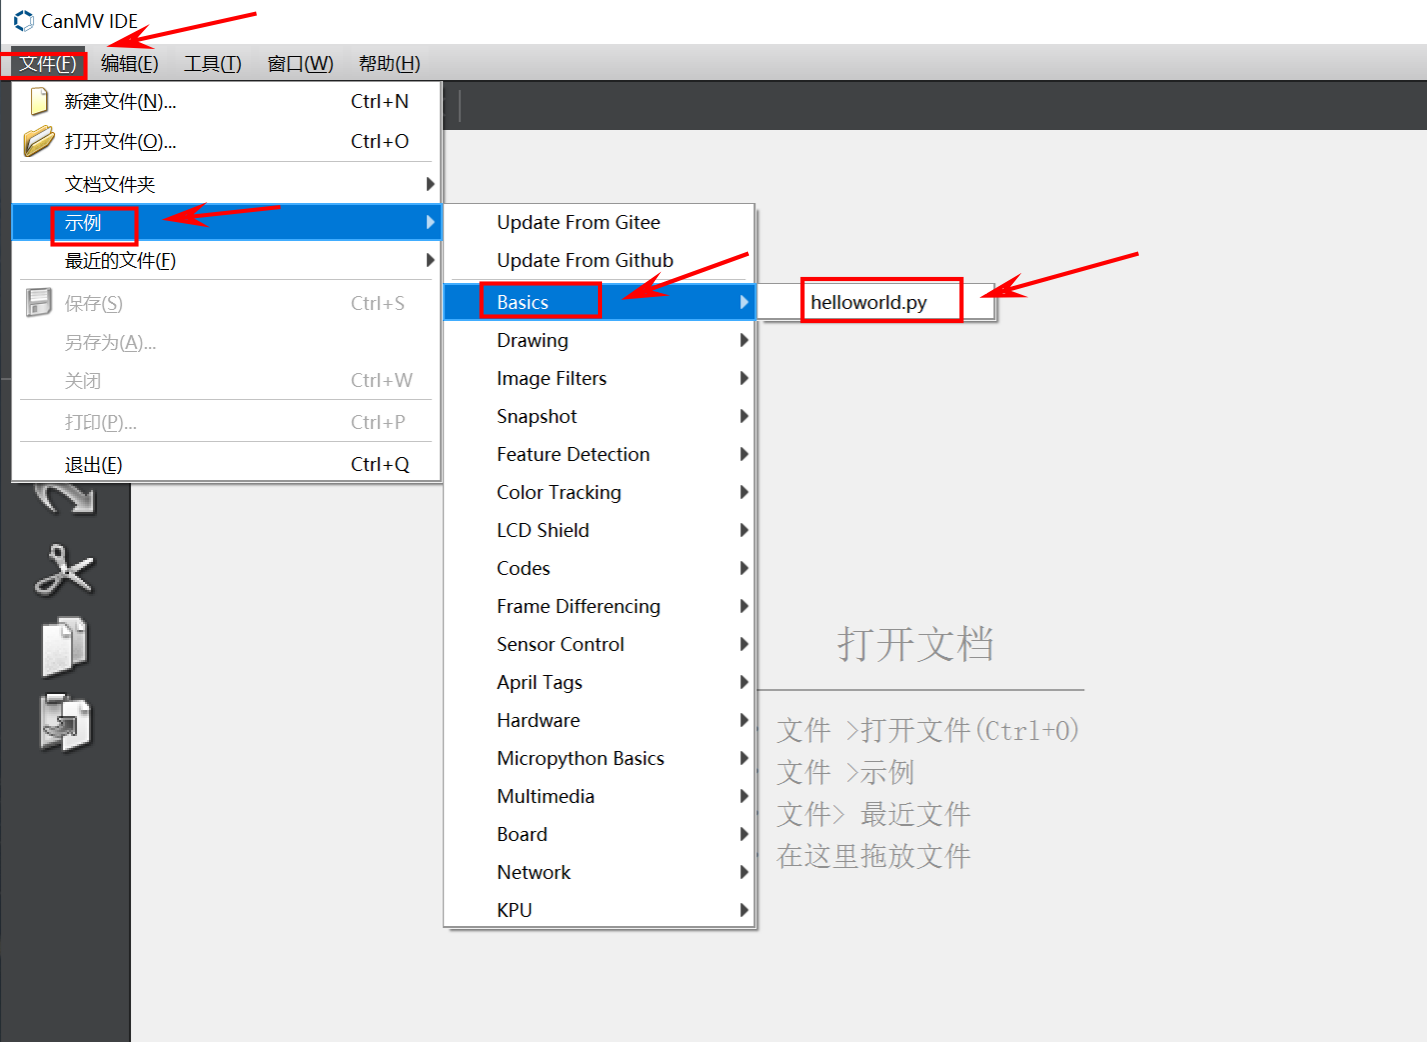
- Click File → Documents Folder → Routines → 01-Basic →
helloworld.py, or click File → Examples → Basics →helloworld.py.
- Click File → Documents Folder → Routines → 01-Basic →
- Click the green Run button in the lower-left corner.
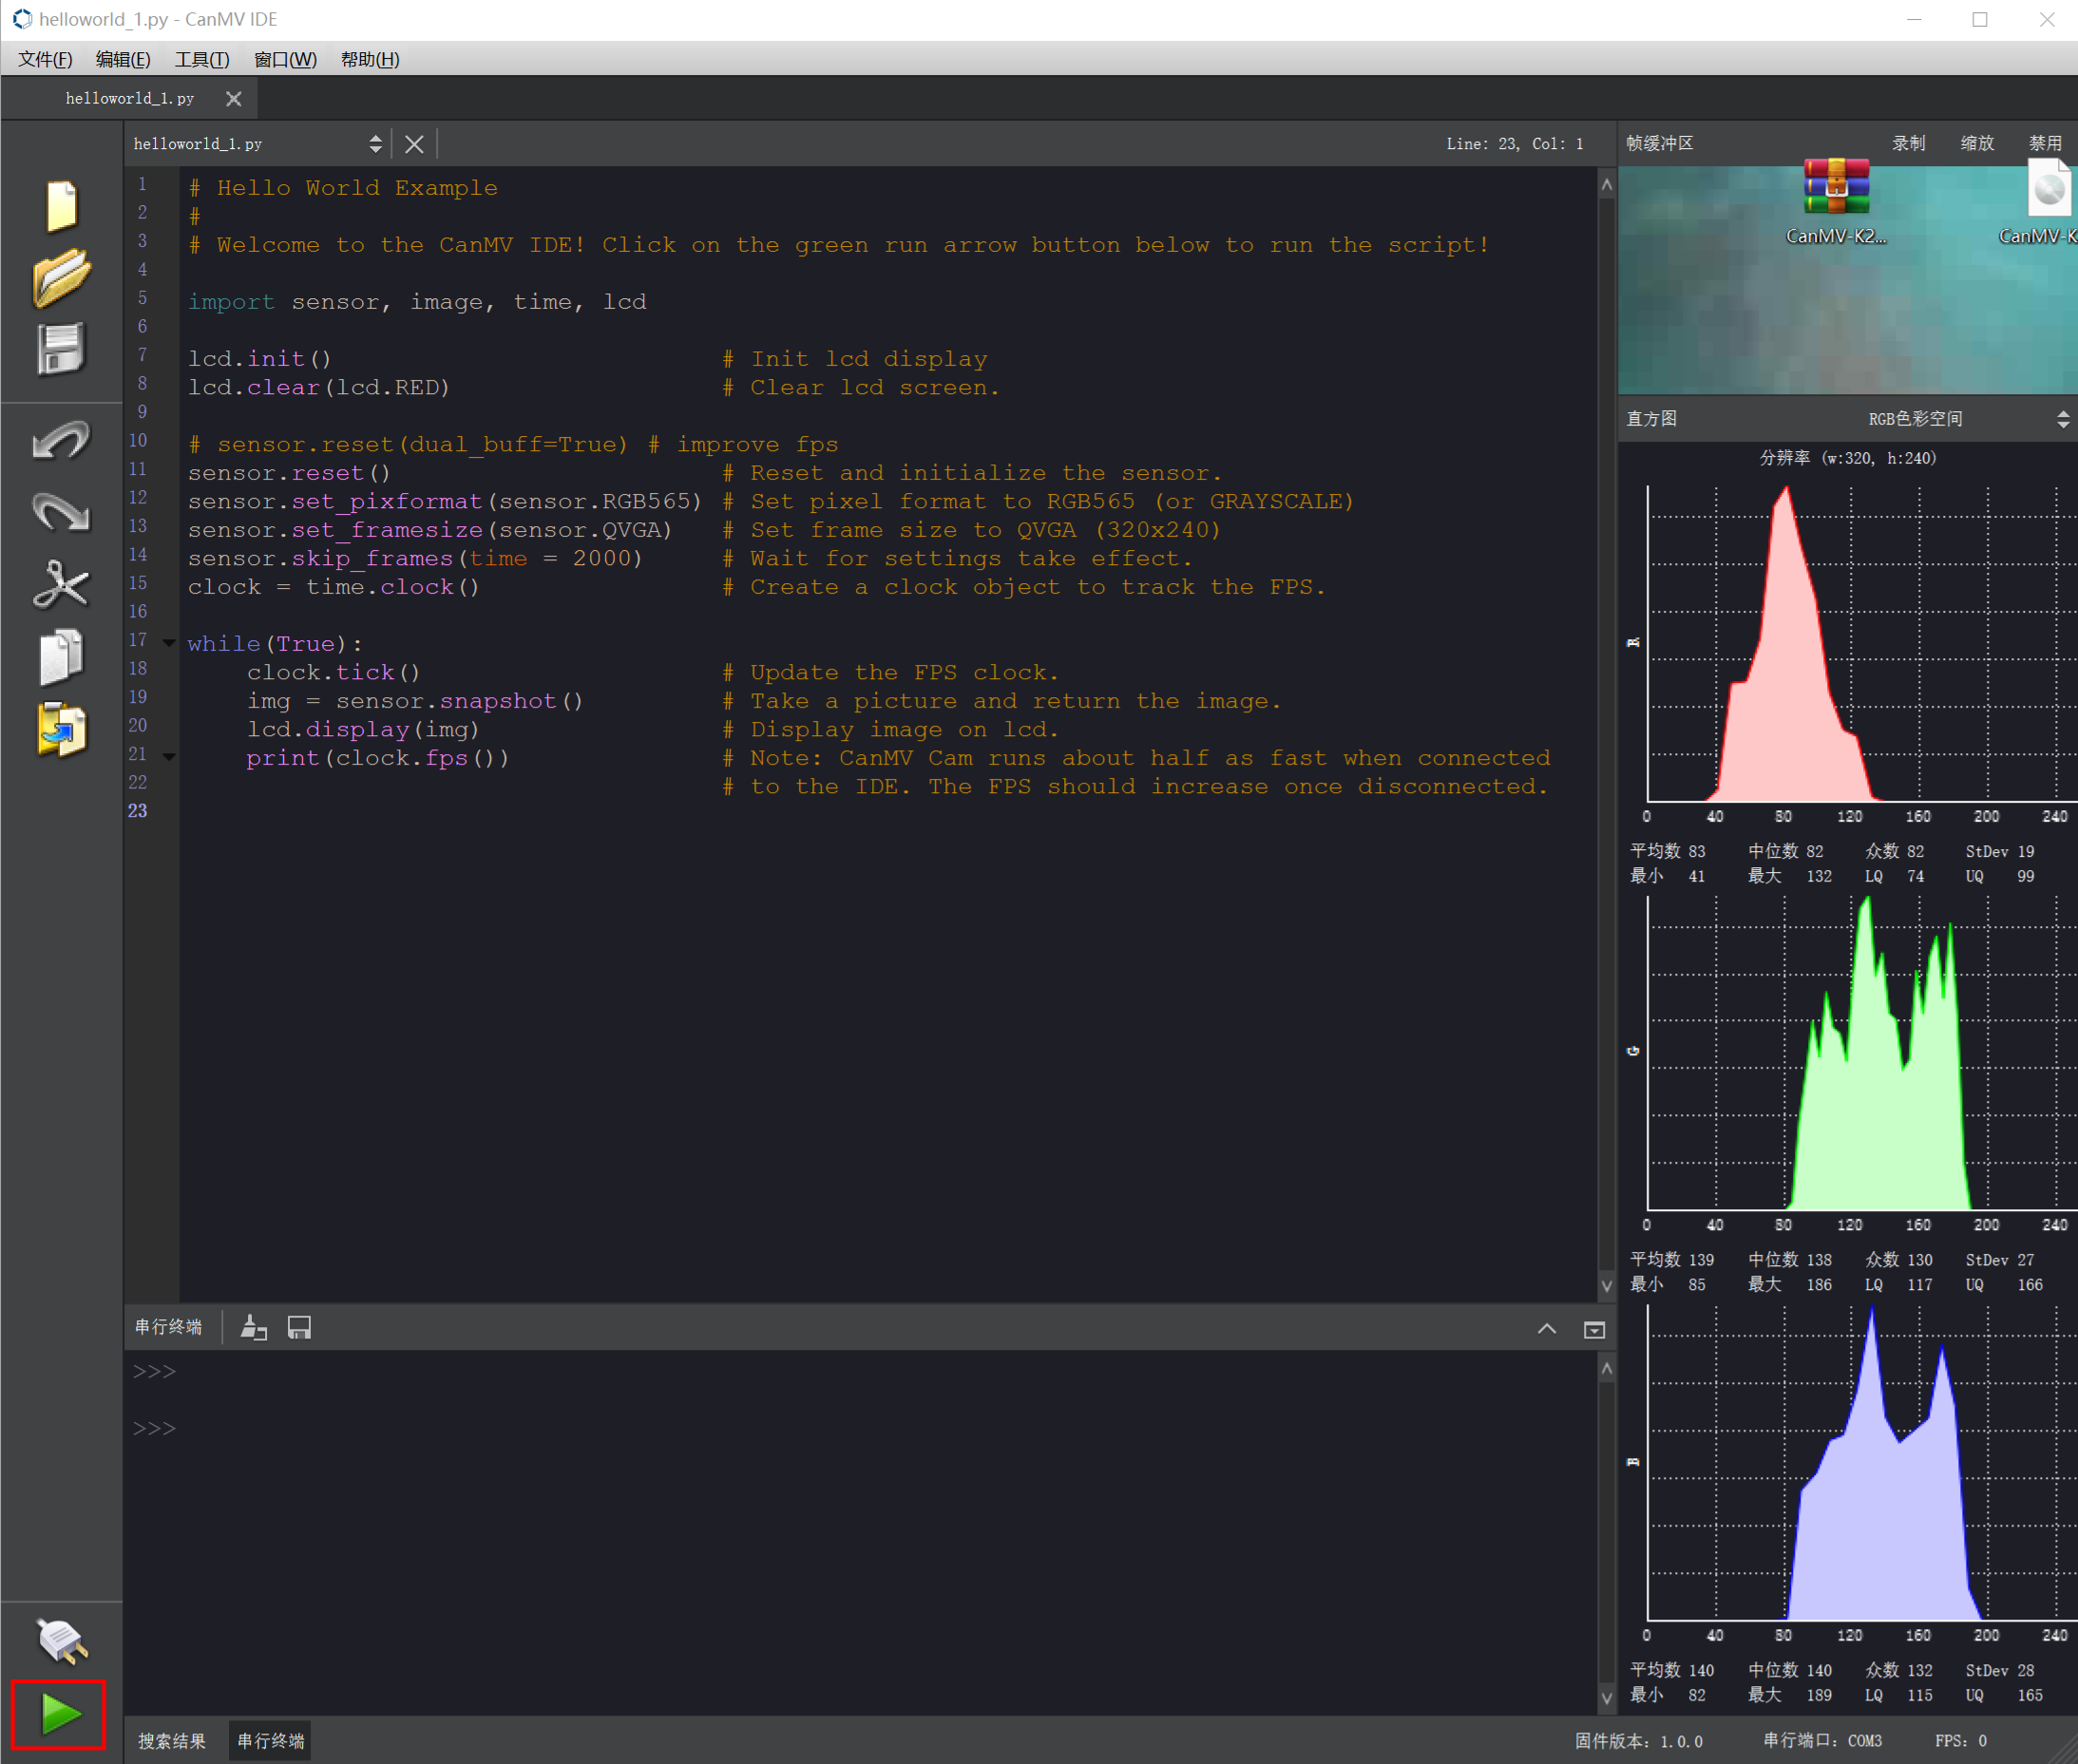
- The K210 first displays a red screen, then shows the camera feed, as shown below.

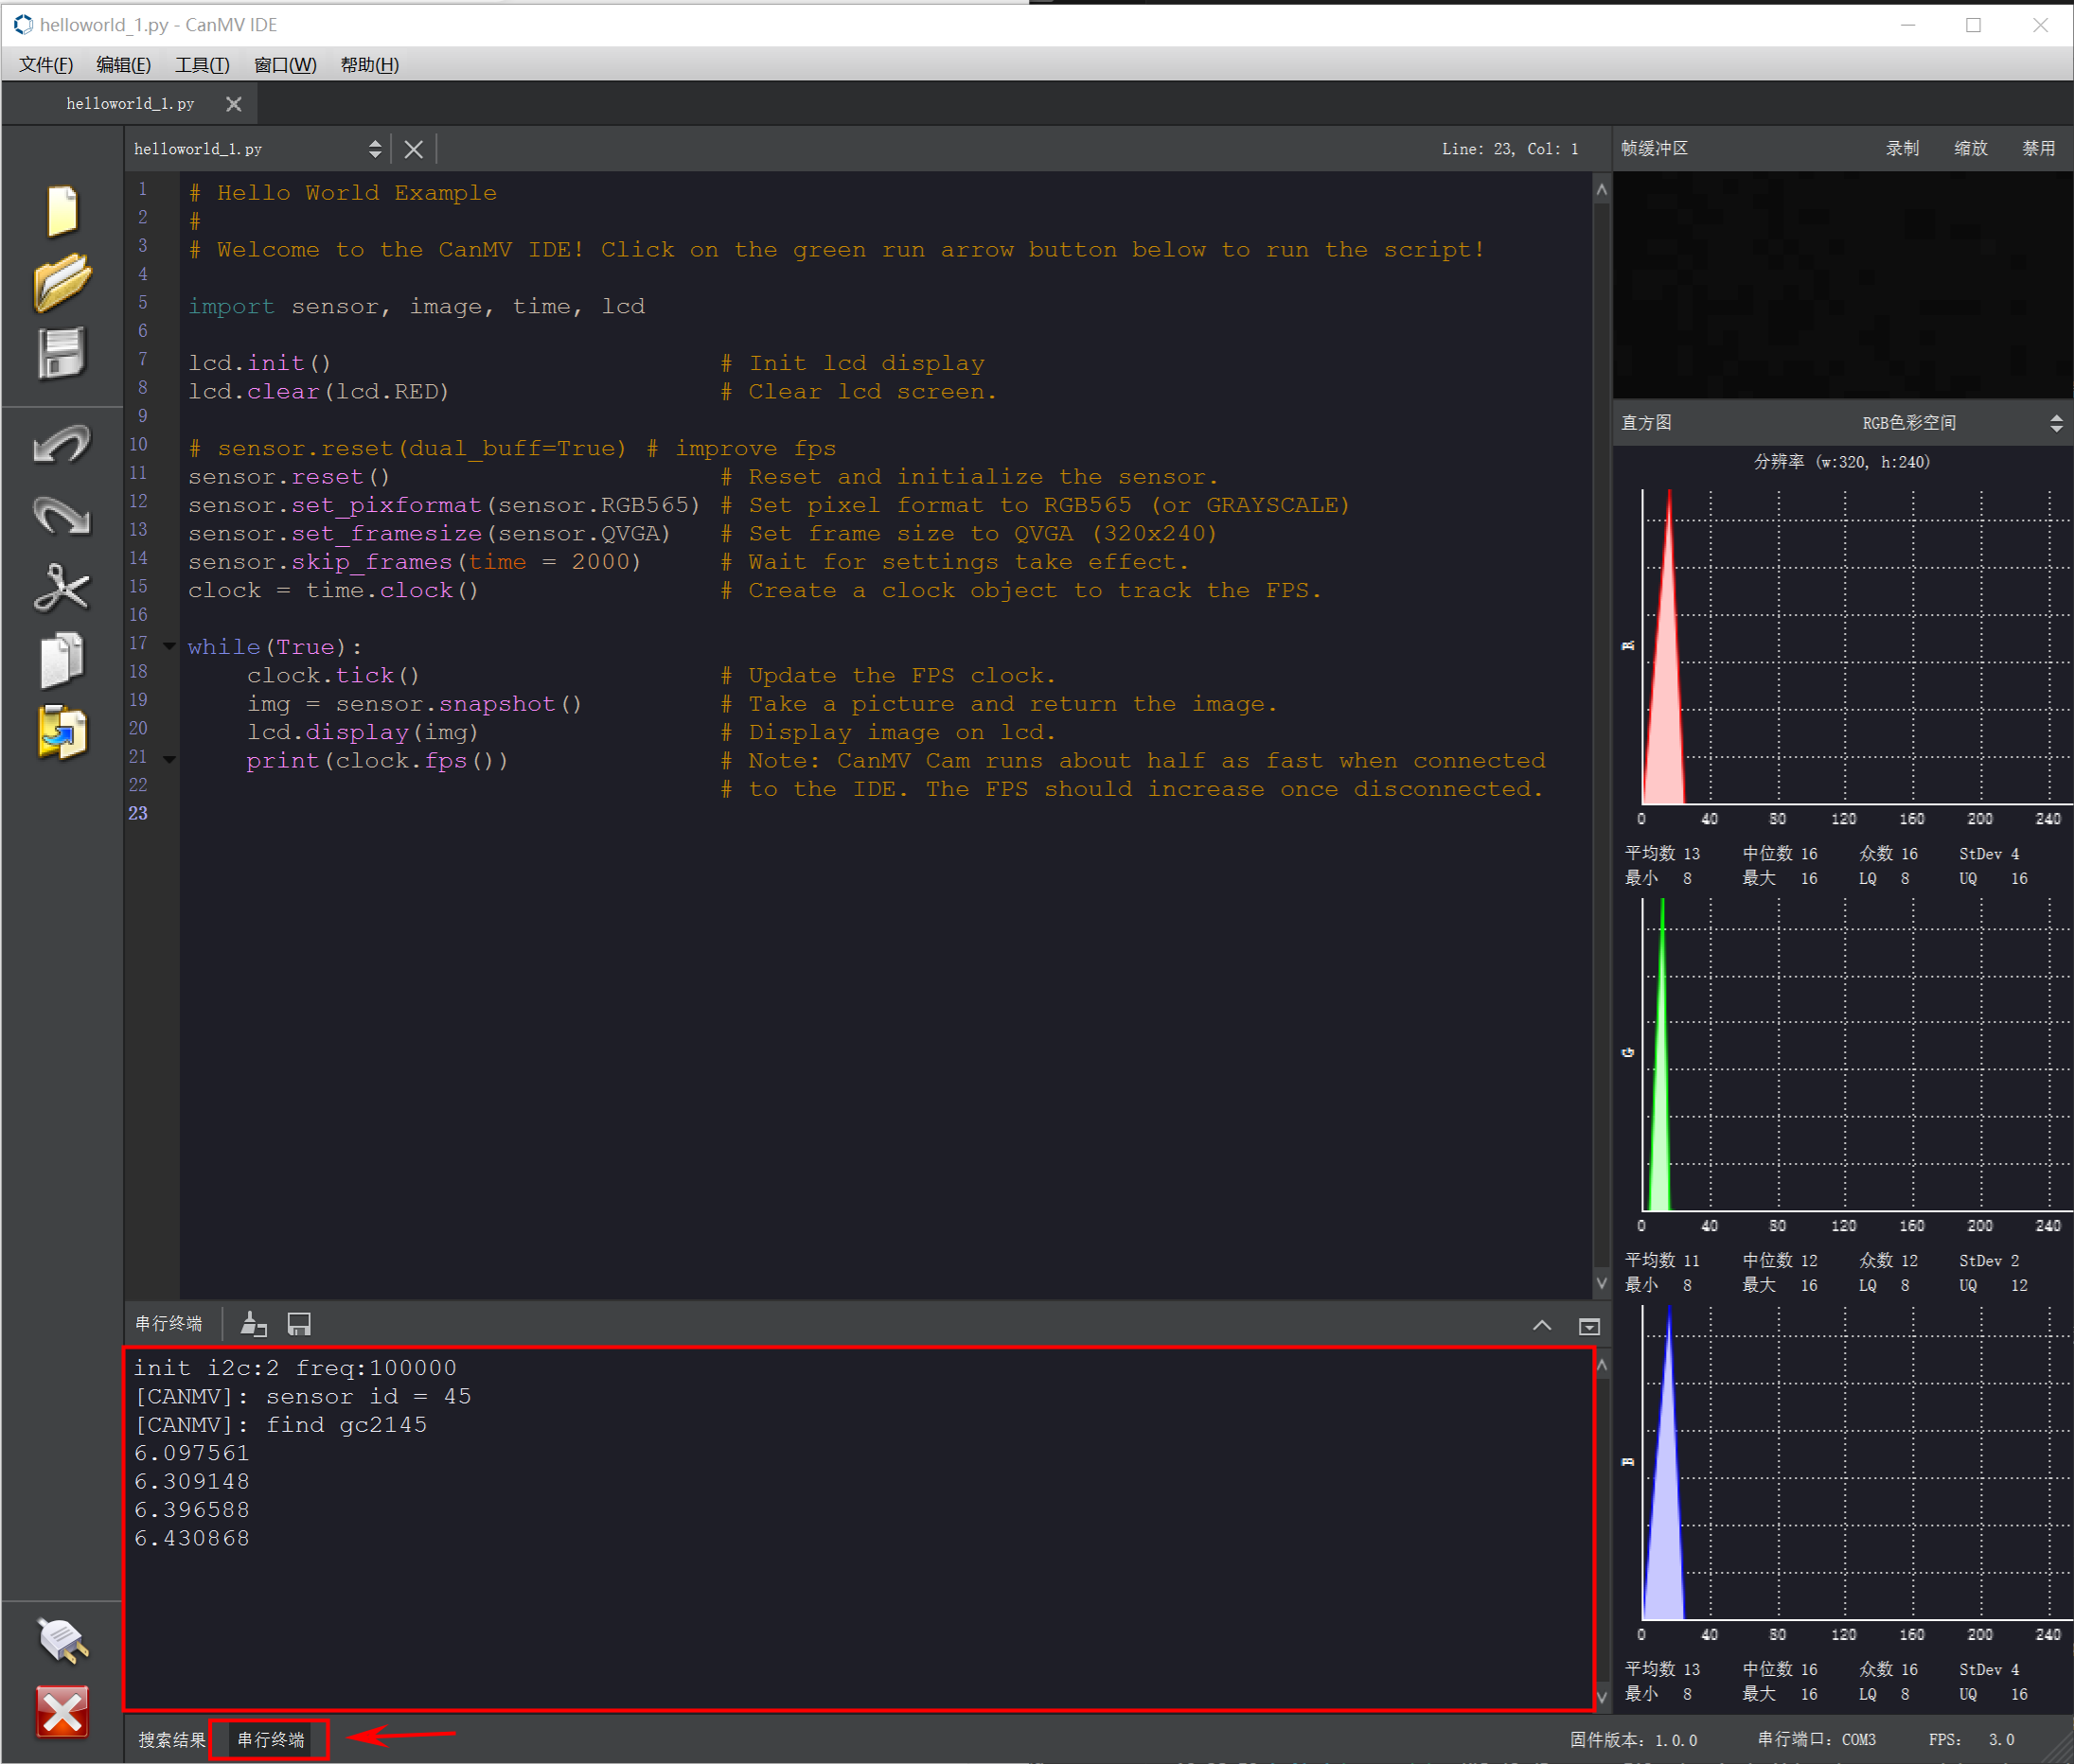
- Click the Serial Terminal in the lower-left corner to view data returned from the K210. Parameters are displayed as shown below. The red X in the lower-left corner stops the running program; after stopping, the K210 runs the default boot program.
5.3 Set Program to Run on Boot
The K210's default boot program displays software information, firmware version, and similar details, as shown below.
The following example shows how to set Routines/Basic/helloworld.py as the boot program.
- Connect the Windows computer and K210 with a Type-C cable.
- Connect the device in CanMV IDE.
- Open the
Routines/01-Basic/helloworld.pyroutine.
- Open the
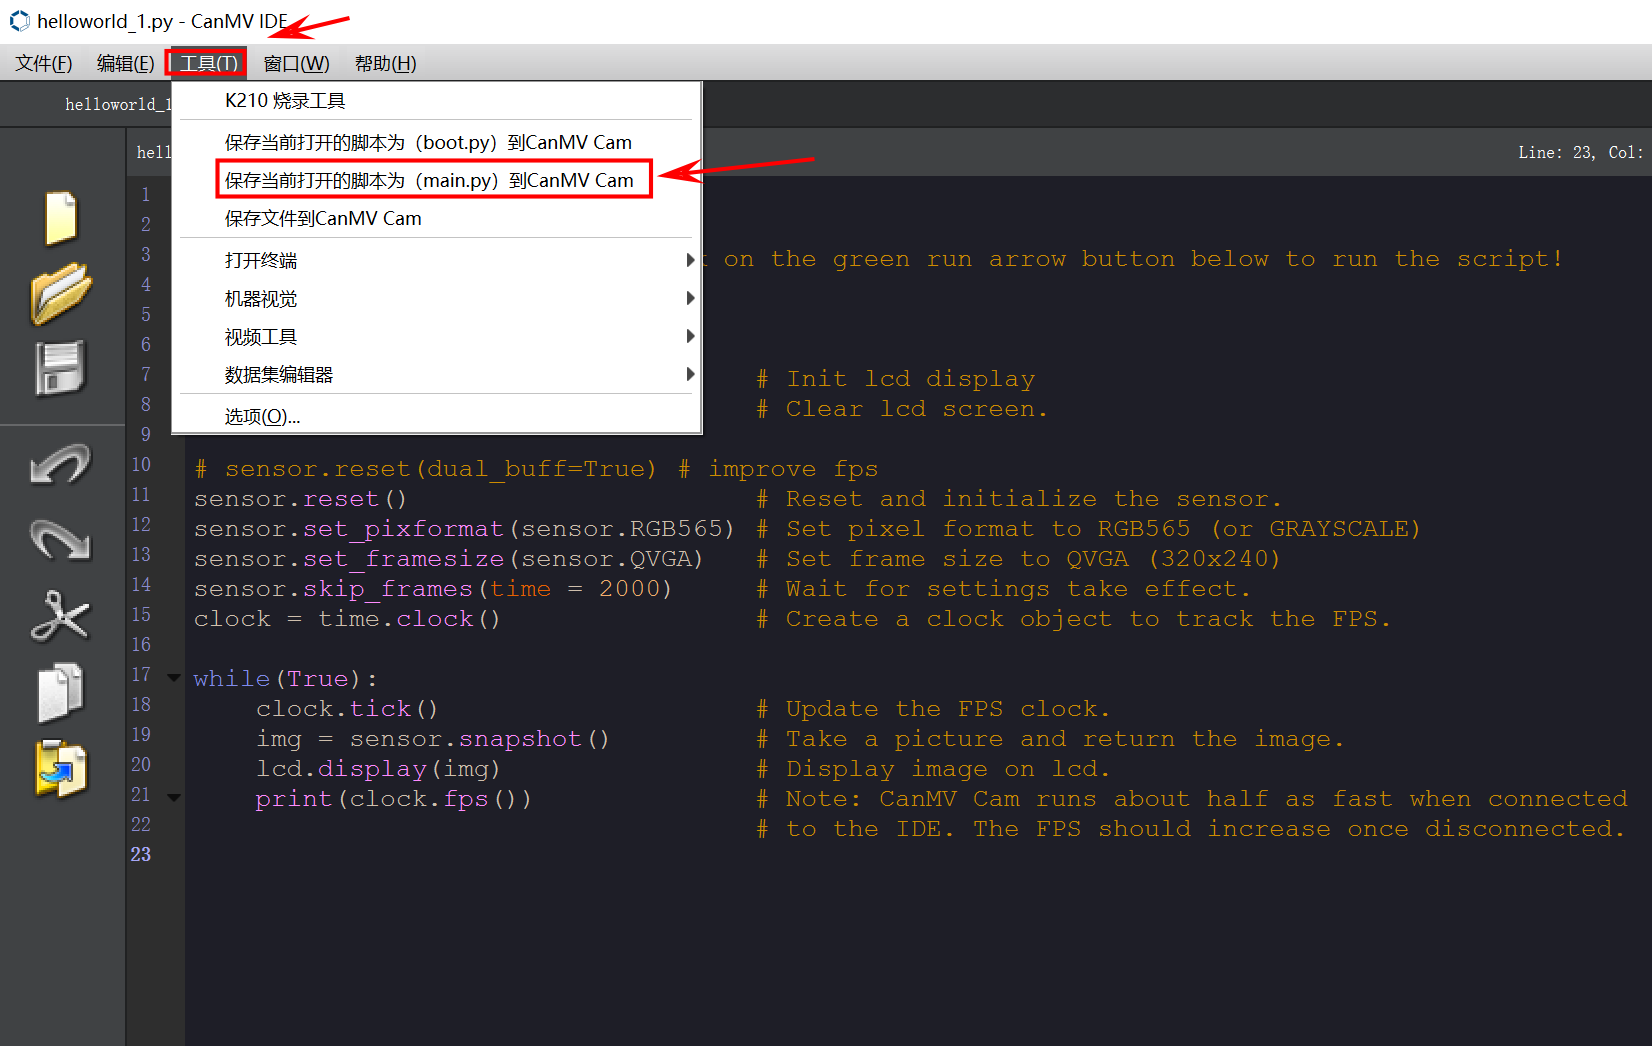
- Click Tools → Save Current Open Script as (main.py) to CanMV Cam, as shown below.
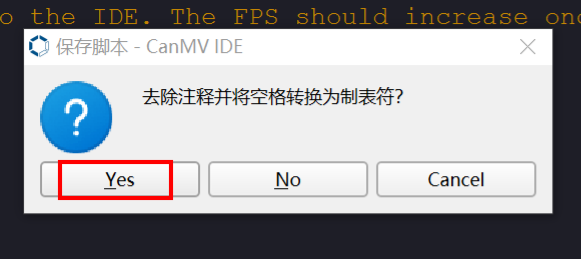
- A dialog appears. Click Yes.
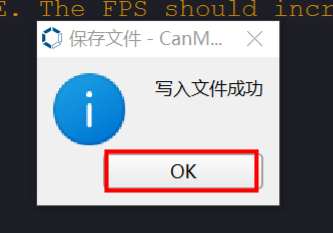
- Wait for the file to save. When successful, Write file succeeded is displayed. Click OK.
- Power-cycle the device. The boot program is now the routine program.
5.4 CanMV IDE Interface Overview
The CanMV IDE layout is shown below:
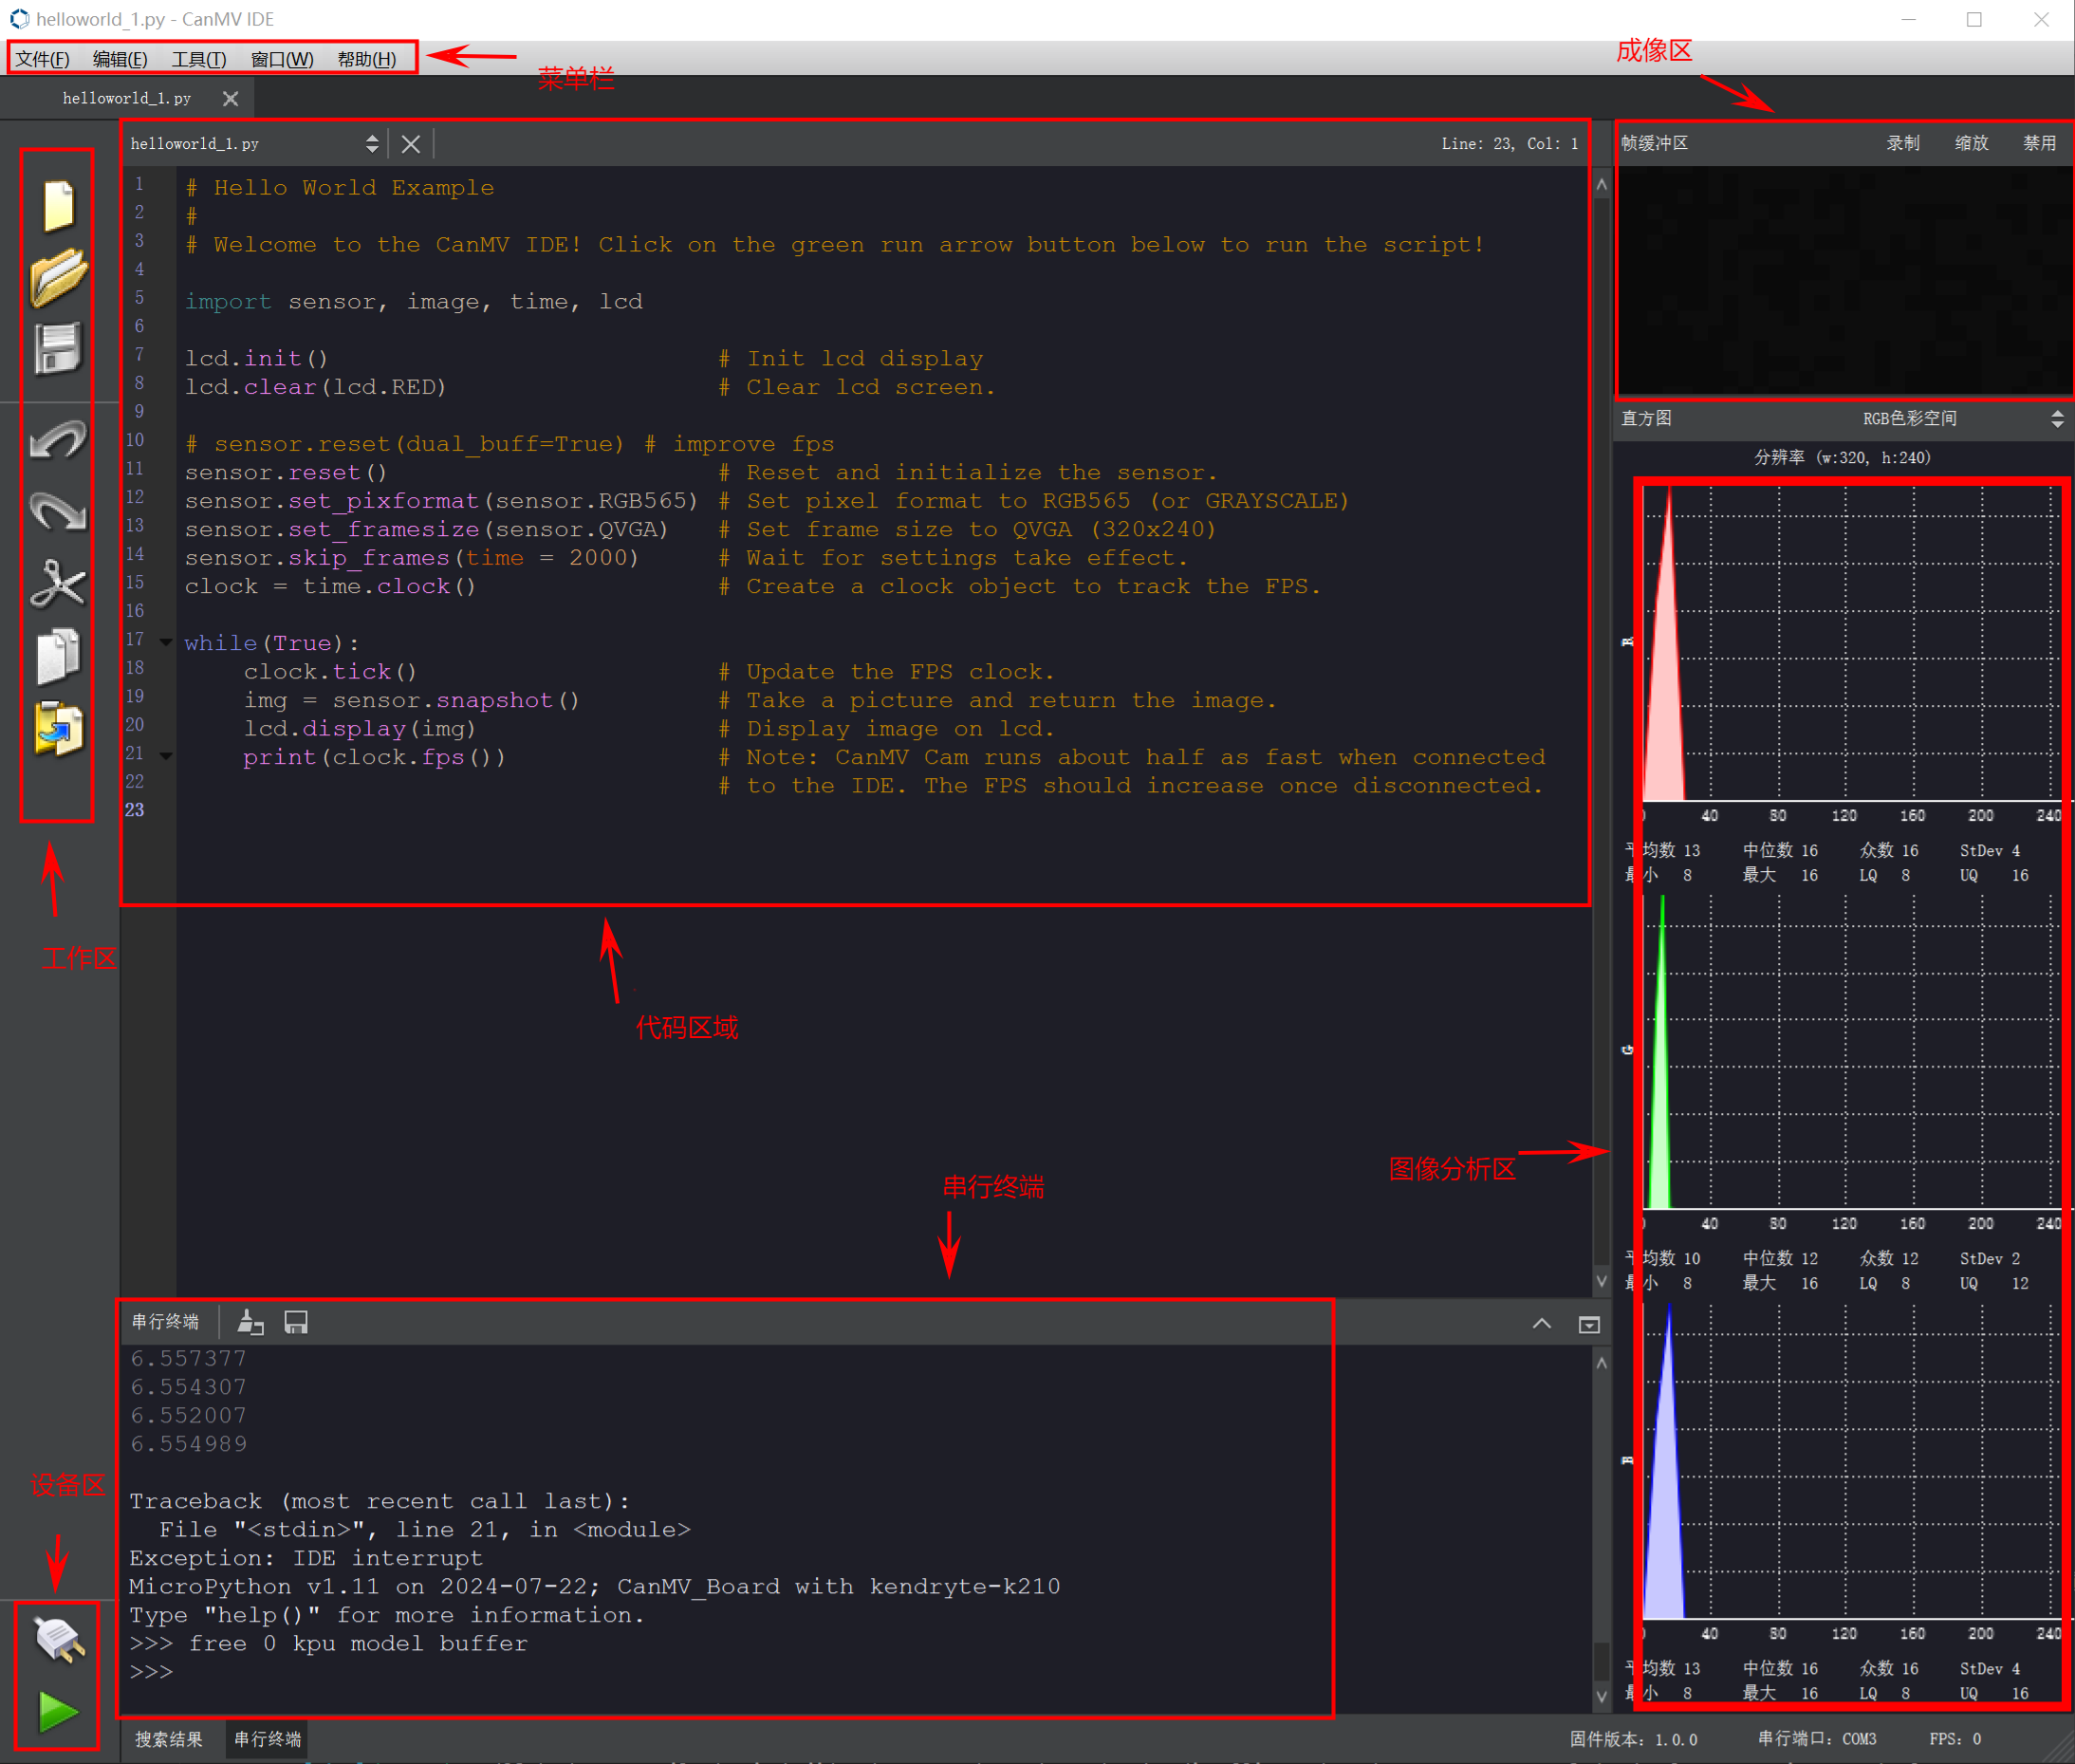
It consists of nine main areas:
- Menu bar: Contains all CanMV IDE functions
- Workspace: Shortcuts for file operations
- Device area: Connect devices and run programs
- Code area: Edit code
- Serial terminal: Interact with the device
- Search: Search for text
- Imaging area: Receive images from the camera
- Image analysis area: Analyze returned images
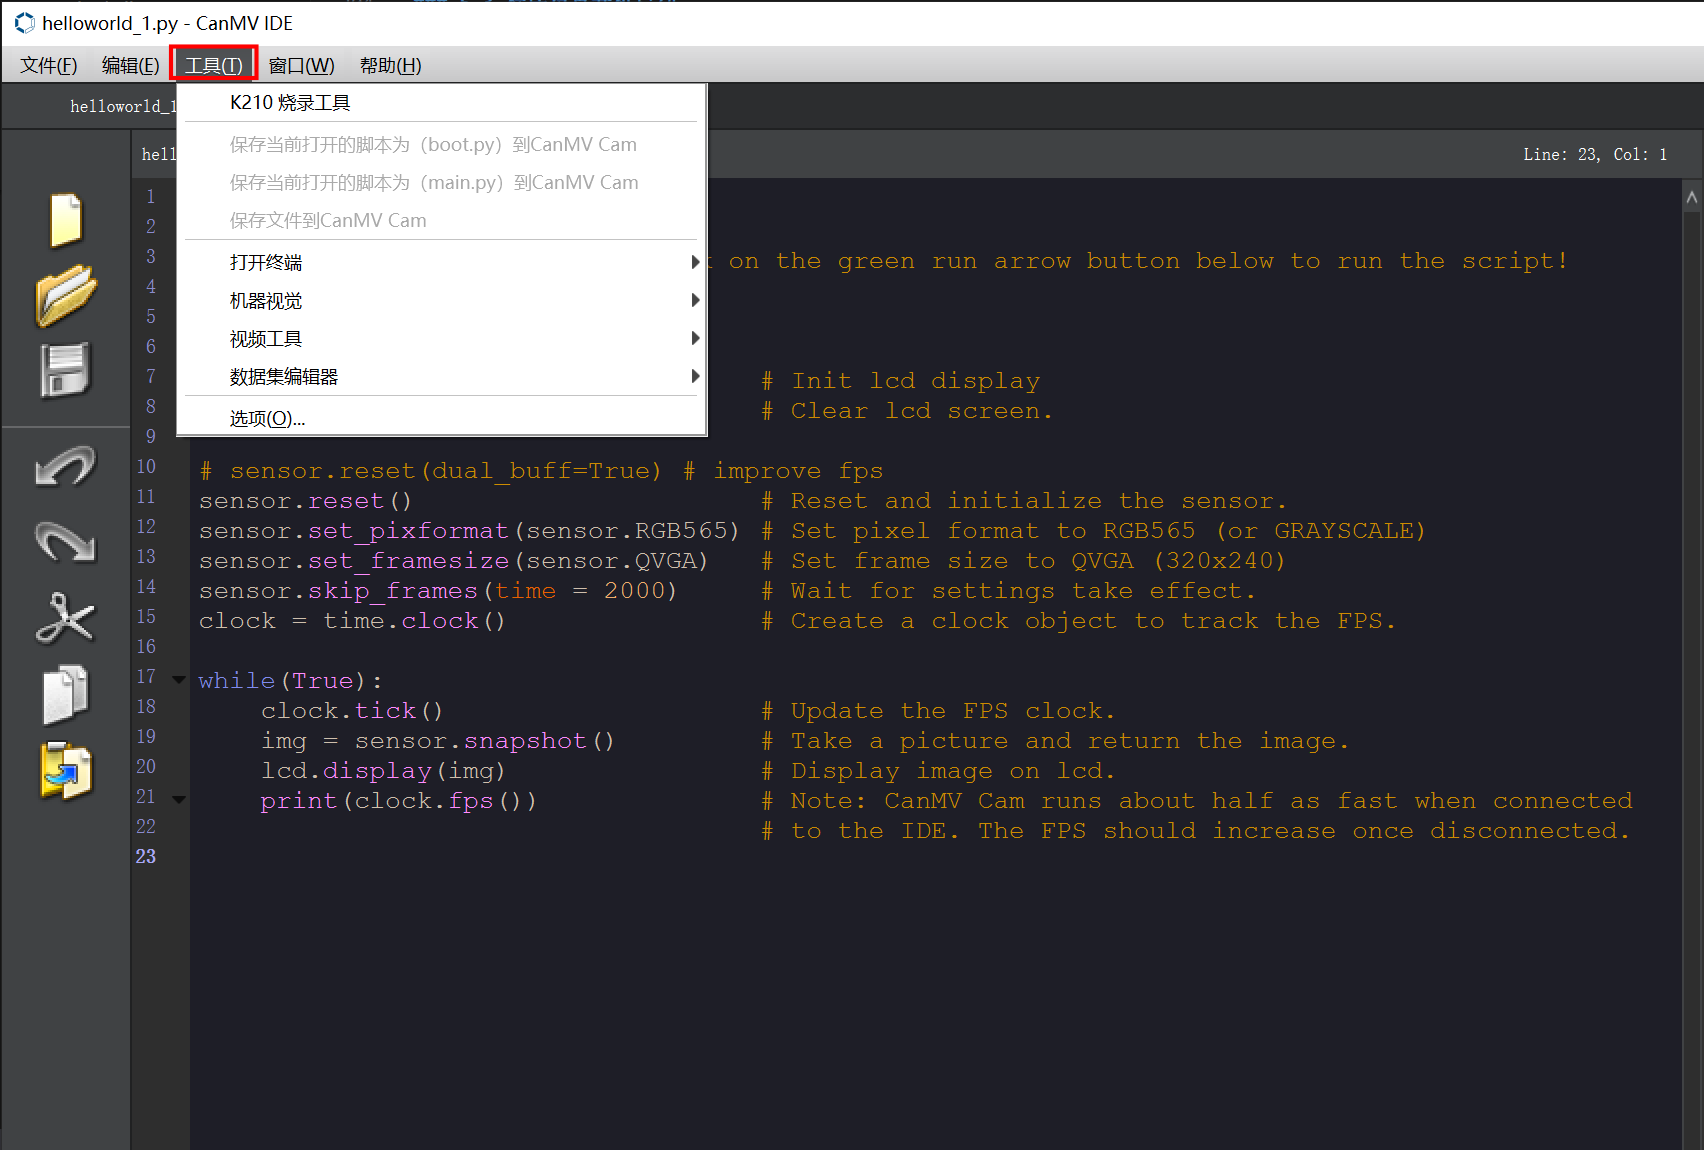
- Tools menu: Additional vision-related tools
6. Transfer Model Files to TF Card
6.1 Model File Overview
Model files typically contain neural network architecture parameters and weights—the result of neural network training. On the K210, models can be used for face detection, mask recognition, face recognition, object recognition, and other machine learning tasks. Because K210 chip resources are limited, trained models must be stored on a TF card. Model files use the .kmodel extension.
6.2 Import Model Files
There are two ways to transfer model files to a TF card.
Method 1: Use a card reader. Insert the TF card into a card reader and connect it to a USB port on your computer. Download and extract the model file archive from the learning materials, then copy the KPU folder to the root of the drive (e.g., H:).
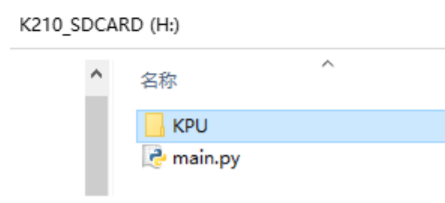
Method 1 lets you import all model files at once, avoiding repeated imports. Different paths distinguish which model file to load. Place all model files under the KPU folder. Do not rename the KPU folder or any files inside it, or the default routines may fail to find model files.
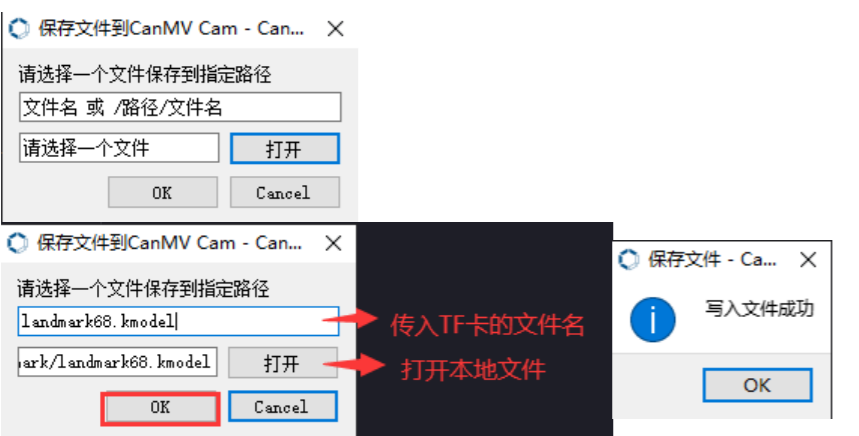
Method 2: Import model files through CanMV IDE without a card reader. The example below imports landmark68.kmodel. Connect the K210 module to a computer USB port via microUSB. Click the Connect button in the lower-left corner of CanMV IDE. After a successful connection, the icon changes to connected and the gray play button turns green.

Open Tools → Save File to CanMV Cam.
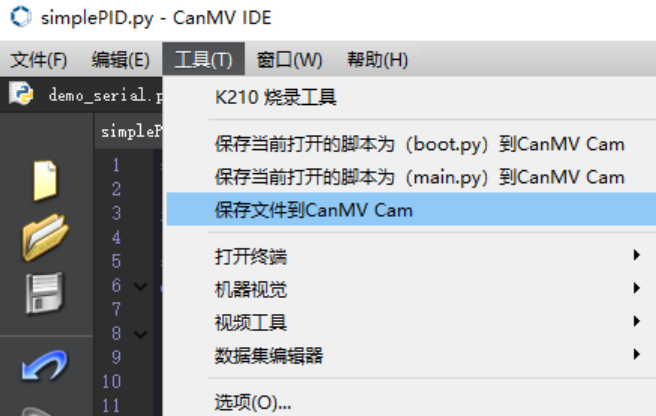
Click Open, select the model file to transfer, and save it to the memory card.
Note: Files written here are saved to the memory card first. When saving, remove the file path—saving with a path can cause errors.
6.3 Run the Program
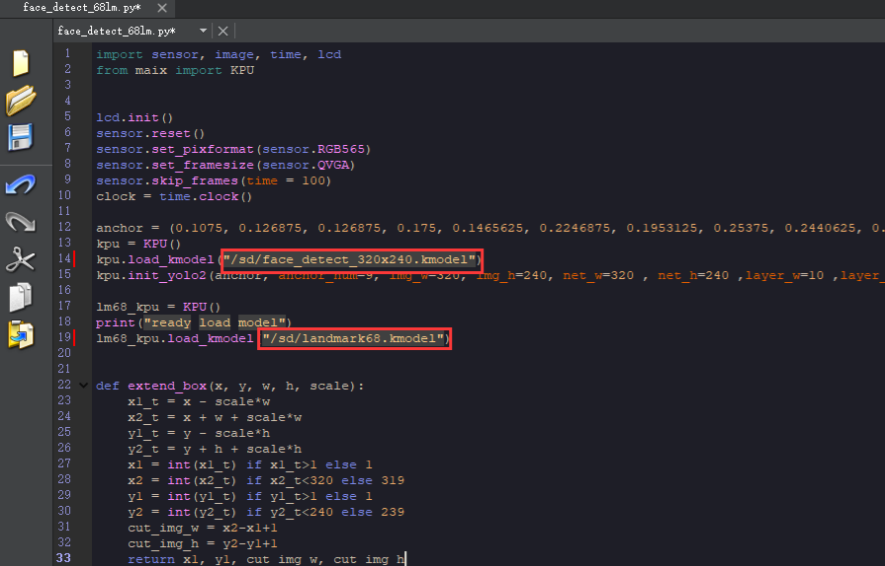
When running code, use the actual model path where the file was saved. If you followed Method 1 in this tutorial, use the default code without modification.
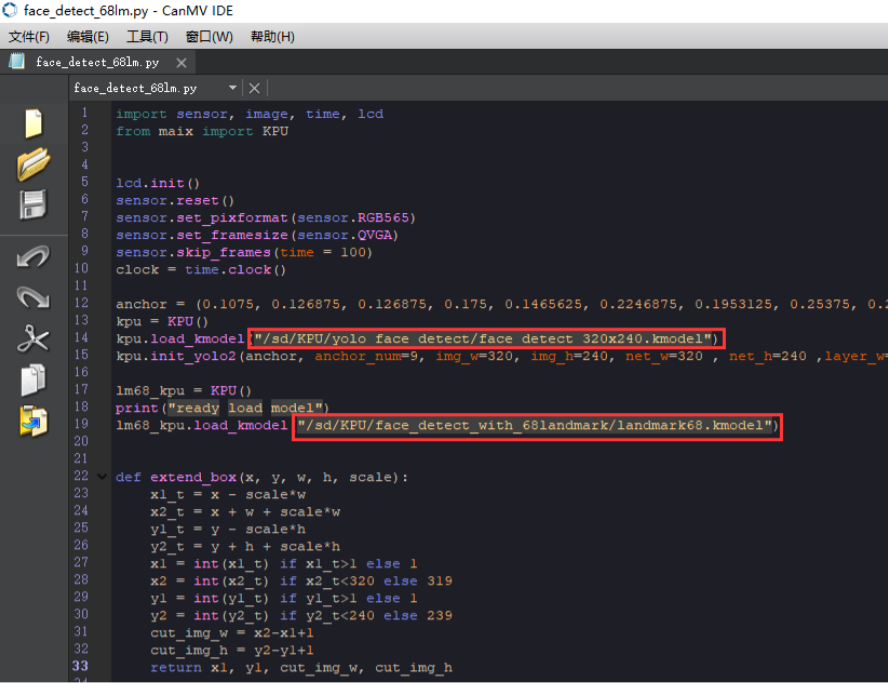
If you followed Method 2, remove the extra path in the program and keep only the /sd/ prefix.